10 Delicious High-Protein Appetizers to Satisfy Your Hunger Before Dinner
10 Delicious High-Protein Appetizers to Satisfy Your Hunger Before Dinner
If you're looking to keep your stomach happy before dinner rolls around, these 10 high-protein appetizers will do the trick. Packed with flavor and satisfying ingredients, these bites will ensure you’re not starving by the time the main course hits the table. Say goodbye to empty snacks and hello to delicious, protein-rich options!
Savory Shrimp Skewers For A Gourmet Touch
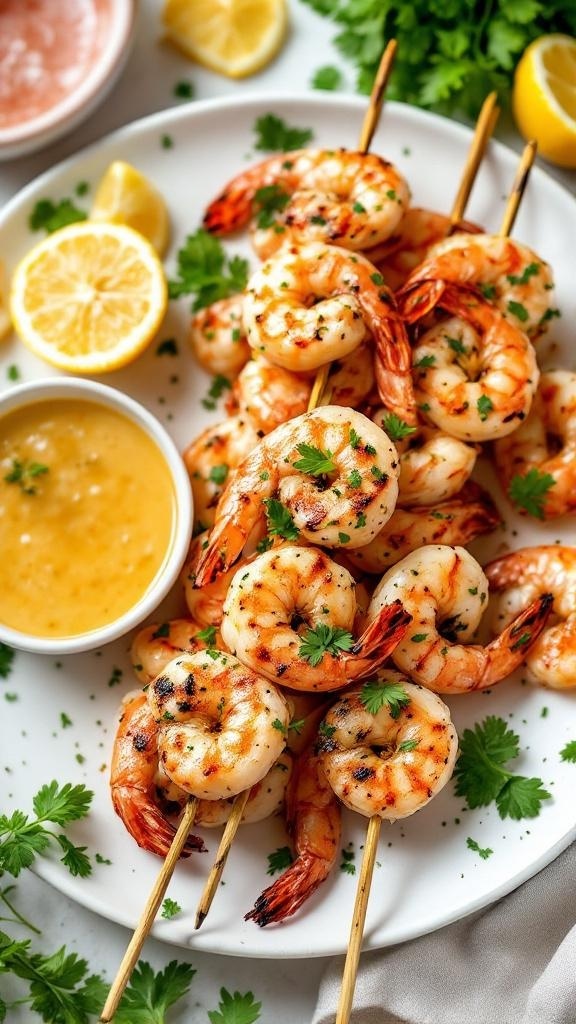
These savory shrimp skewers are a fantastic way to add a gourmet touch to your appetizer spread. They look amazing on the plate, with their golden-brown color and fresh herbs. The juicy shrimp are perfectly grilled, making them a crowd-pleaser at any gathering.
Pair these skewers with a zesty dipping sauce, and you've got a dish that’s not just tasty but also high in protein. The combination of shrimp and fresh ingredients keeps you feeling satisfied until dinner time. Plus, they’re super easy to make!
Ingredients
- 1 pound large shrimp, peeled and deveined
- 2 tablespoons olive oil
- 2 cloves garlic, minced
- 1 teaspoon paprika
- 1 teaspoon salt
- 1/2 teaspoon black pepper
- Juice of 1 lemon
- Fresh parsley, chopped (for garnish)
- Skewers (soaked in water if wooden)
Instructions
- Marinate the Shrimp: In a bowl, combine olive oil, garlic, paprika, salt, pepper, and lemon juice. Add the shrimp and toss to coat. Let it marinate for at least 15 minutes.
- Prepare the Skewers: Thread the marinated shrimp onto the skewers, making sure to leave a little space between each shrimp.
- Grill the Skewers: Preheat your grill to medium-high heat. Grill the skewers for about 2-3 minutes on each side, or until the shrimp are opaque and cooked through.
- Garnish and Serve: Remove from the grill, sprinkle with fresh parsley, and serve with your favorite dipping sauce.
Cheesy And Delicious Spinach Artichoke Dip
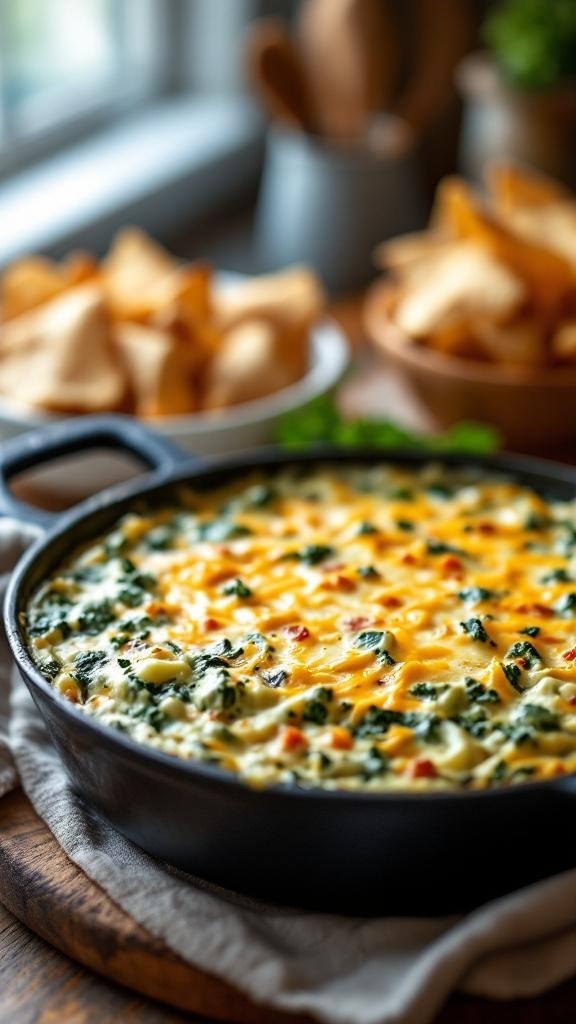
Spinach artichoke dip is a classic appetizer that never fails to impress. The creamy texture and cheesy goodness make it a favorite at gatherings. In the image, you can see a bubbling dish of this dip, topped with melted cheese, ready to be enjoyed. Surrounding the dip are crispy chips, perfect for scooping up every last bite.
This dish is not just tasty; it’s also packed with protein from the cheese and spinach. It’s a great way to keep hunger at bay until dinner. Whether you’re hosting a party or just looking for a snack, this dip is a winner.
Making spinach artichoke dip is simple and requires just a few ingredients. You’ll love how easy it is to whip up this cheesy delight!
Ingredients
- 1 cup frozen spinach, thawed and drained
- 1 cup canned artichoke hearts, chopped
- 1 cup cream cheese, softened
- 1/2 cup sour cream
- 1/2 cup mayonnaise
- 1 cup shredded mozzarella cheese
- 1/2 cup grated Parmesan cheese
- 1 teaspoon garlic powder
- Salt and pepper to taste
Instructions
- Preheat your oven to 350°F (175°C).
- In a mixing bowl, combine the softened cream cheese, sour cream, and mayonnaise until smooth.
- Add the chopped spinach, artichoke hearts, mozzarella cheese, Parmesan cheese, garlic powder, salt, and pepper. Mix well.
- Transfer the mixture to a baking dish and spread it evenly.
- Bake for 25-30 minutes, or until the dip is hot and bubbly, and the top is golden brown.
- Serve warm with tortilla chips or sliced baguette for dipping.
GET 21 QUICK & EASY LOW-CALORIE MEAL PLANS
Hearty Turkey And Quinoa Stuffed Peppers
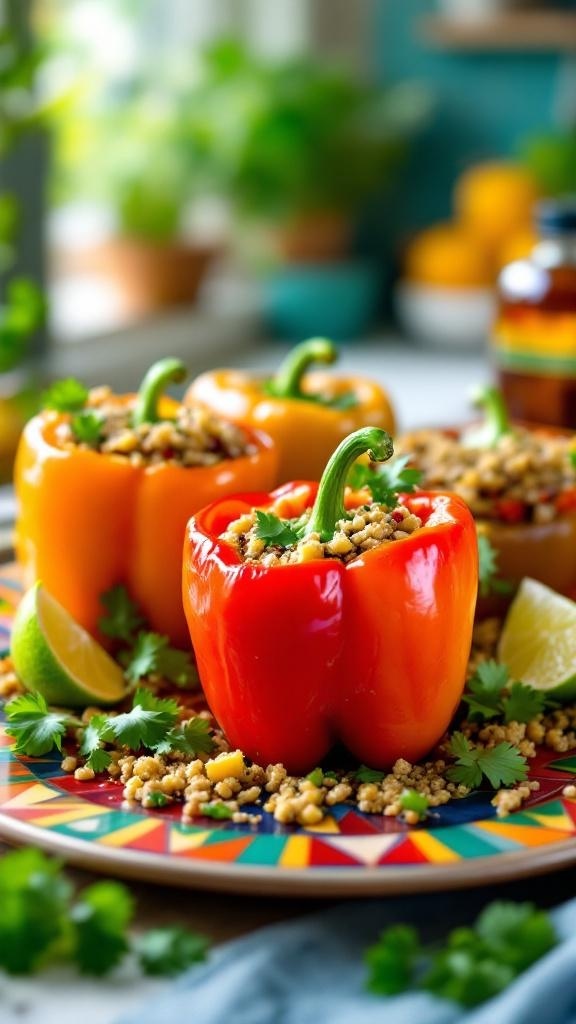
These hearty turkey and quinoa stuffed peppers are a fantastic way to enjoy a nutritious appetizer. The vibrant colors of the red and yellow peppers make them visually appealing, while the filling is packed with protein and flavor. Each pepper is filled to the brim with a savory mixture of ground turkey, quinoa, and spices, making them a satisfying bite.
Not only do these stuffed peppers look great on a plate, but they also provide a healthy dose of nutrients. Quinoa is a complete protein, and when combined with turkey, it creates a filling dish that can keep you satisfied until dinner. Plus, the fresh cilantro and lime add a refreshing touch that brightens up the flavors.
These stuffed peppers are easy to make and can be prepped ahead of time, making them perfect for gatherings or a cozy night in. Serve them warm, and watch them disappear!
Ingredients
- 4 medium bell peppers (red and yellow)
- 1 pound ground turkey
- 1 cup cooked quinoa
- 1 small onion, diced
- 2 cloves garlic, minced
- 1 teaspoon cumin
- 1 teaspoon chili powder
- Salt and pepper to taste
- 1 cup diced tomatoes (canned or fresh)
- 1/4 cup fresh cilantro, chopped
- Juice of 1 lime
Instructions
- Preheat the oven to 375°F (190°C).
- Cut the tops off the bell peppers and remove the seeds. Place them in a baking dish.
- In a skillet, cook the ground turkey over medium heat until browned. Add the onion and garlic, cooking until softened.
- Stir in the cooked quinoa, diced tomatoes, cumin, chili powder, salt, pepper, cilantro, and lime juice. Mix well.
- Stuff each pepper with the turkey and quinoa mixture, pressing down gently to pack it in.
- Cover the baking dish with foil and bake for 25-30 minutes. Remove the foil and bake for an additional 10 minutes, until the peppers are tender.
- Serve warm, garnished with extra cilantro and lime wedges if desired.
Classic Hummus With A Twist Of Flavor
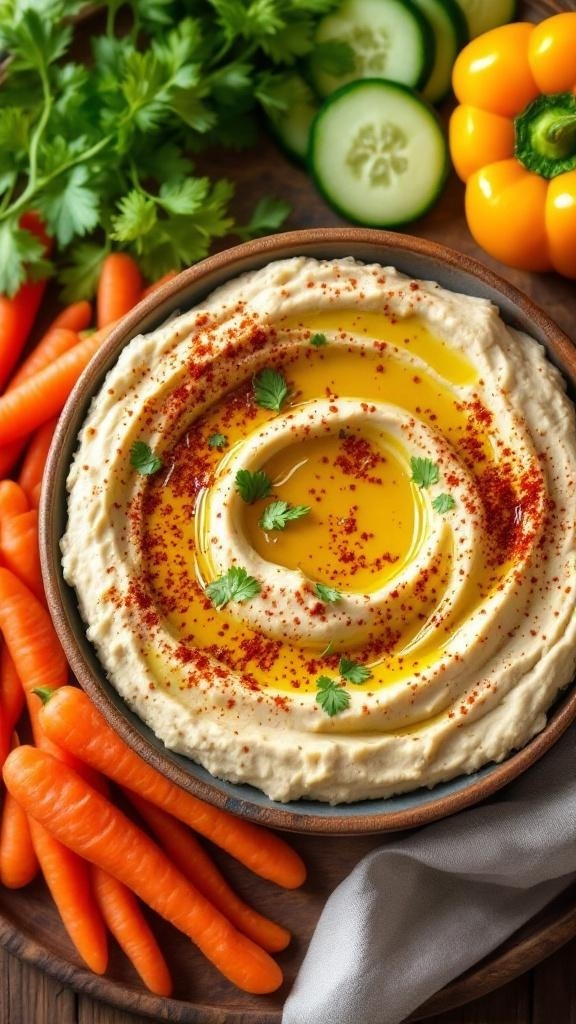
Hummus is a classic appetizer that never goes out of style. It’s creamy, rich, and packed with protein, making it a perfect choice to keep you satisfied until dinner. The image shows a beautifully presented bowl of hummus drizzled with olive oil and sprinkled with paprika. Surrounding the hummus are fresh vegetables like carrots and cucumbers, ready for dipping.
This version of hummus has a twist of flavor that sets it apart. Adding ingredients like roasted garlic or sun-dried tomatoes can elevate the taste. The vibrant colors of the veggies add a nice touch, making it not just tasty but also visually appealing.
Whether you’re hosting a gathering or just enjoying a snack, this hummus is sure to impress. Serve it with a variety of dippers for a fun and healthy appetizer that everyone will love.
Ingredients
- 1 can (15 oz) chickpeas, drained and rinsed
- 1/4 cup tahini
- 2 tablespoons olive oil
- 2 tablespoons lemon juice
- 1 clove garlic, minced
- 1/2 teaspoon ground cumin
- Salt to taste
- Water as needed for consistency
- Paprika for garnish
- Fresh parsley for garnish
Instructions
- Blend the Ingredients: In a food processor, combine chickpeas, tahini, olive oil, lemon juice, garlic, cumin, and salt. Blend until smooth.
- Adjust Consistency: If the hummus is too thick, add water a tablespoon at a time until you reach your desired consistency.
- Serve: Transfer the hummus to a serving bowl. Drizzle with olive oil and sprinkle paprika and parsley on top for garnish.
- Enjoy: Serve with fresh veggies, pita bread, or crackers for dipping.
Zesty Chicken Satay With Peanut Sauce

Chicken satay is a delightful appetizer that packs a punch of flavor. The skewers are grilled to perfection, offering a smoky taste that pairs beautifully with the creamy peanut sauce. The vibrant colors in the image showcase the juicy chicken drizzled with a rich sauce, surrounded by fresh cucumber slices and herbs. This dish not only looks appealing but is also high in protein, making it a perfect choice to keep you satisfied until dinner.
The combination of tender chicken and zesty peanut sauce creates a mouthwatering experience. You can easily whip up this dish for a gathering or just a cozy night in. It’s fun to eat and even more enjoyable to share!
Ingredients
- 1 pound boneless, skinless chicken breasts
- 1 tablespoon soy sauce
- 1 tablespoon lime juice
- 1 tablespoon brown sugar
- 1 teaspoon garlic powder
- 1 teaspoon ground ginger
- 1/2 teaspoon salt
- 1/4 teaspoon black pepper
- Wooden skewers (soaked in water for 30 minutes)
- 1/2 cup peanut butter
- 1/4 cup coconut milk
- 2 tablespoons soy sauce
- 1 tablespoon lime juice
- 1 tablespoon honey
- 1 teaspoon sriracha (optional)
- Fresh cilantro and cucumber slices for garnish
Instructions
- Prepare the Marinade: In a bowl, mix soy sauce, lime juice, brown sugar, garlic powder, ground ginger, salt, and pepper. Add the chicken and marinate for at least 30 minutes.
- Make the Peanut Sauce: In a small saucepan, combine peanut butter, coconut milk, soy sauce, lime juice, honey, and sriracha. Heat over low, stirring until smooth and creamy.
- Skewer the Chicken: Thread marinated chicken onto soaked skewers.
- Grill the Skewers: Preheat the grill to medium-high heat. Grill the skewers for about 5-7 minutes on each side, or until the chicken is cooked through.
- Serve: Drizzle the peanut sauce over the grilled chicken and garnish with fresh cilantro and cucumber slices. Enjoy your zesty chicken satay!
GET 8-WEEKS OF WORKOUTS TO LOSE INCHES
Satisfying Greek Yogurt And Cucumber Bites
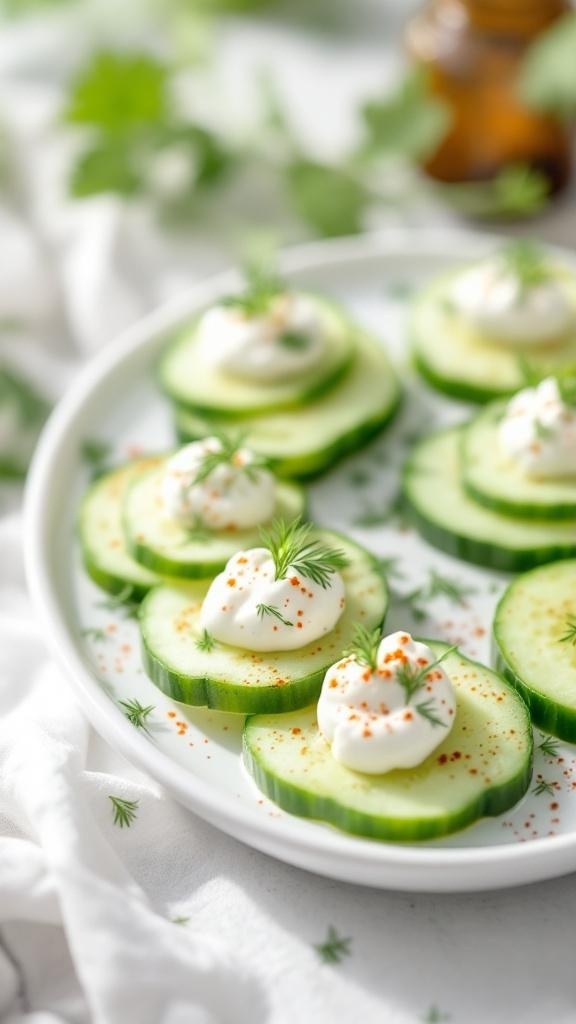
Greek yogurt and cucumber bites are a refreshing and protein-packed appetizer that’s perfect for any gathering. These little bites are not only easy to make but also look beautiful on a platter. The creamy yogurt pairs perfectly with the crisp cucumber, making them a delightful treat.
To prepare these bites, start by slicing cucumbers into thick rounds. Then, top each slice with a dollop of Greek yogurt. You can add a sprinkle of paprika or fresh herbs like dill for extra flavor. These bites are light, satisfying, and will keep you full until dinner.
Ingredients
- 1 large cucumber
- 1 cup Greek yogurt
- 1 tablespoon fresh dill, chopped
- 1 teaspoon paprika
- Salt and pepper to taste
Instructions
- Slice the cucumber into thick rounds, about 1/2 inch each.
- In a bowl, mix Greek yogurt with chopped dill, salt, and pepper.
- Top each cucumber slice with a generous dollop of the yogurt mixture.
- Sprinkle paprika over the yogurt for added flavor and color.
- Serve immediately and enjoy!
Savory Prosciutto-Wrapped Asparagus
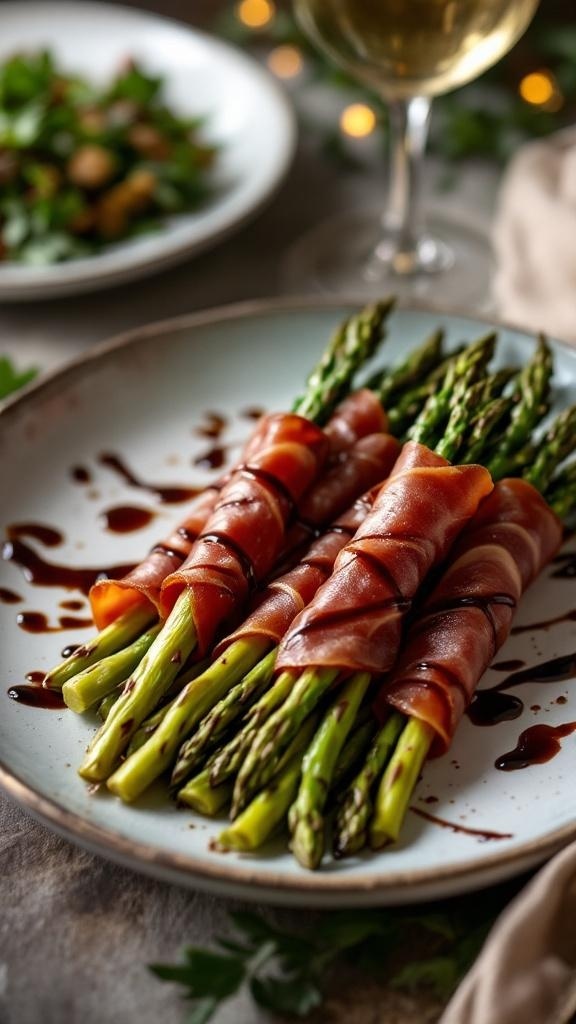
Prosciutto-wrapped asparagus is a delightful appetizer that combines the crispness of fresh asparagus with the rich, salty flavor of prosciutto. This dish not only looks elegant but also packs a protein punch, making it a perfect choice for keeping you satisfied until dinner.
The image showcases beautifully arranged asparagus spears, each wrapped in thin slices of prosciutto. The glossy balsamic drizzle adds a touch of sweetness, enhancing the overall flavor profile. This appetizer is not just visually appealing; it’s also simple to prepare, making it a go-to for gatherings or a cozy night in.
To make this dish, you’ll need just a few ingredients and a bit of time. The combination of textures and flavors will impress your guests and keep your hunger at bay!
Ingredients
- 1 bunch of fresh asparagus (about 1 pound)
- 8 ounces of prosciutto, thinly sliced
- 2 tablespoons olive oil
- Salt and pepper to taste
- Balsamic glaze for drizzling
Instructions
- Preheat your oven to 400°F (200°C).
- Wash and trim the asparagus, removing the tough ends.
- Wrap each asparagus spear with a slice of prosciutto, starting at the bottom and spiraling up to the tip.
- Place the wrapped asparagus on a baking sheet lined with parchment paper.
- Drizzle with olive oil and season with salt and pepper.
- Bake for 10-15 minutes, or until the prosciutto is crispy and the asparagus is tender.
- Remove from the oven and drizzle with balsamic glaze before serving.
Tantalizing Buffalo Cauliflower Bites
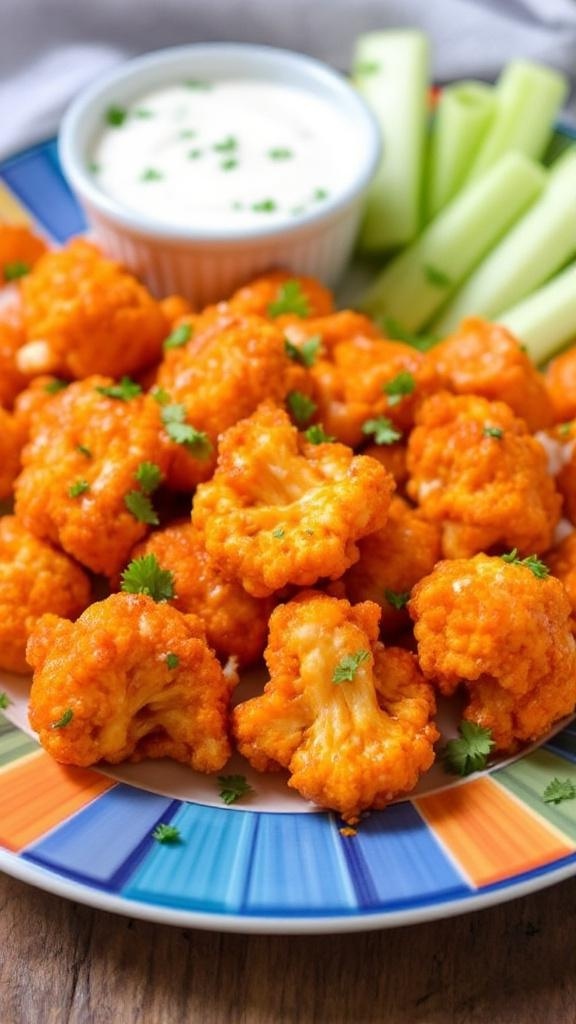
Buffalo cauliflower bites are a fantastic way to enjoy a classic flavor without the meat. These bites are crispy, spicy, and perfect for snacking. The bright orange color and the crispy texture make them visually appealing and appetizing. They are served with a side of creamy dipping sauce and crunchy celery sticks, adding a refreshing contrast to the heat of the buffalo sauce.
These bites are not just tasty; they are also packed with protein, making them a great appetizer to keep you satisfied until dinner. Whether you’re hosting a party or just looking for a snack, these buffalo cauliflower bites will surely impress your guests.
Ingredients
- 1 medium head of cauliflower, cut into bite-sized florets
- 1 cup all-purpose flour
- 1 cup water
- 1 teaspoon garlic powder
- 1 teaspoon onion powder
- 1/2 teaspoon salt
- 1 cup buffalo sauce
- 2 tablespoons olive oil
- Celery sticks, for serving
- Ranch or blue cheese dressing, for dipping
Instructions
- Preheat your oven to 450°F (230°C) and line a baking sheet with parchment paper.
- In a large bowl, mix flour, water, garlic powder, onion powder, and salt until smooth.
- Dip each cauliflower floret into the batter, allowing excess to drip off, and place them on the baking sheet.
- Bake for 20 minutes, flipping halfway through, until golden and crispy.
- In a separate bowl, combine the baked cauliflower with buffalo sauce and olive oil, tossing to coat evenly.
- Return the coated cauliflower to the baking sheet and bake for an additional 10 minutes.
- Serve hot with celery sticks and your favorite dipping sauce.
Savory Mini Quiches With A Variety Of Fillings

Mini quiches are a fantastic choice for appetizers. They are bite-sized, easy to make, and can be filled with a variety of ingredients. You can customize them to suit different tastes, making them perfect for gatherings or just a snack at home.
These little quiches are often made with a flaky crust, filled with eggs, cheese, and your choice of vegetables or meats. Some popular fillings include spinach and feta, bacon and cheddar, or even mushrooms and Swiss cheese. The options are endless!
To prepare these mini quiches, you can use pre-made pastry shells or make your own from scratch. Once you have your crust ready, whisk together eggs, milk, and seasonings. Pour the mixture into the crusts, add your fillings, and bake until golden and set.
Ingredients
- 1 package of pre-made pastry shells
- 6 large eggs
- 1 cup milk
- 1 cup shredded cheese (cheddar, mozzarella, or your choice)
- 1 cup diced vegetables (spinach, bell peppers, onions, etc.)
- 1 cup cooked and crumbled bacon or sausage (optional)
- Salt and pepper to taste
Instructions
- Preheat your oven to 375°F (190°C).
- Arrange the pastry shells on a baking sheet.
- In a bowl, whisk together the eggs, milk, salt, and pepper.
- Evenly distribute the diced vegetables and meat (if using) into each pastry shell.
- Pour the egg mixture over the fillings, filling each shell about 3/4 full.
- Sprinkle cheese on top of each quiche.
- Bake for 20-25 minutes, or until the egg is set and the tops are golden.
- Let them cool slightly before serving. Enjoy your delicious mini quiches!
Tangy Cucumber And Feta Salad Skewers
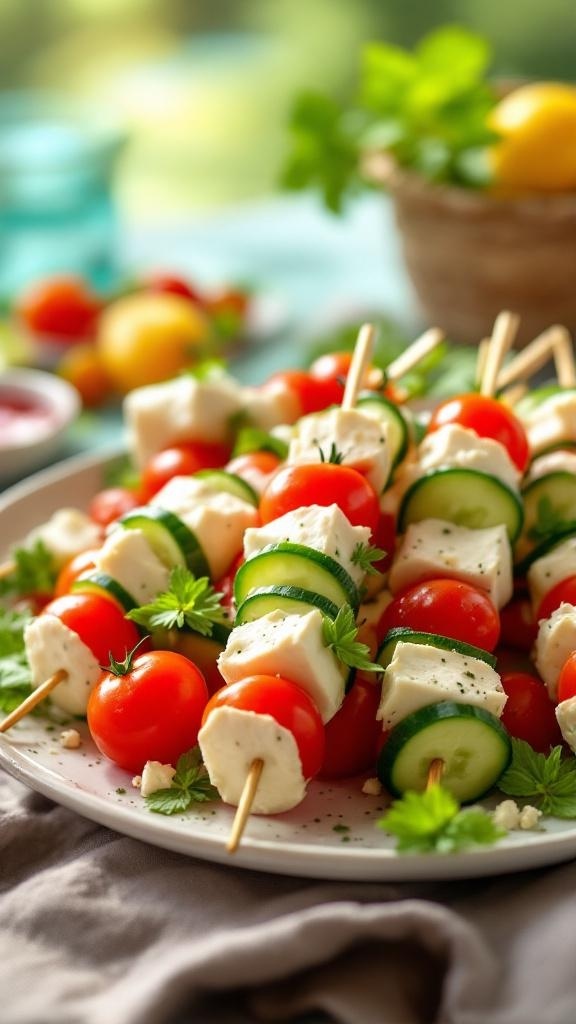
These Tangy Cucumber and Feta Salad Skewers are a delightful way to enjoy fresh ingredients. The vibrant colors of cherry tomatoes, cucumber slices, and creamy feta cheese come together beautifully on skewers. This dish is not only visually appealing but also packed with protein, making it a perfect appetizer to keep you satisfied until dinner.
To make these skewers, you’ll need some simple ingredients. The combination of crunchy cucumbers and tangy feta creates a refreshing bite. Plus, they’re easy to assemble, making them a great choice for gatherings or a quick snack at home.
Ingredients
- 1 cup cherry tomatoes
- 1 cucumber, sliced
- 1 cup feta cheese, cubed
- Fresh parsley or mint for garnish
- Salt and pepper to taste
- Olive oil (optional)
Instructions
- Prepare the Ingredients: Start by washing the cherry tomatoes and cucumber. Slice the cucumber into thin rounds.
- Assemble the Skewers: Take a skewer and thread on a cherry tomato, followed by a cucumber slice, and then a cube of feta cheese. Repeat until the skewer is filled, leaving some space at the ends.
- Season: Once all skewers are assembled, sprinkle with salt and pepper. Drizzle with olive oil if desired.
- Garnish: Add fresh parsley or mint on top for an extra burst of flavor.
- Serve: Arrange the skewers on a platter and enjoy them fresh!
Struggling to Stay on Track with Your Eating?
You’re not alone. One of the biggest obstacles I see people
face is not knowing what to eat. Between busy schedules, endless diet
advice online, and trying to cook healthy meals that actually taste good—it’s
easy to feel stuck or overwhelmed.
That’s why I created my 21 Quick & Easy Custom
Low-Calorie Meal Plans Program. These plans are built specifically for
you—your goals, your lifestyle, and your food preferences. You won’t find
any cookie-cutter diets here. Just real, satisfying meals that help you stay
full, energized, and on track without the stress.
✅ No more guessing.
✅
No more skipping meals or eating “diet food” you hate.
✅
Just a clear, doable plan that fits your life.
👉 Ready to eat better,
feel better, and finally make progress? [Click here to get your custom meal plans today.]
Not Seeing the Inches Drop No Matter What You Do?
If you’re working out but still not seeing the results in
the mirror, I hear you. So many people come to me after months of doing cardio
or random workouts—and still struggling to lose inches or tone up. The truth
is, your body needs more than just movement. It needs a proven strategy.
My 8-Week Workout Program to Lose Inches is designed
to do just that—burn fat, tighten up, and give you visible results.
These workouts are fun, effective, and designed for real people with real
lives. Whether you’re getting back into fitness or ready to take it to the next
level, this program gives you a clear path to success.
✅ Just 8 weeks to build strength,
confidence, and a fitter shape.
✅
No endless cardio.
✅
No gym required (unless you want it).
👉 If you're ready to
drop inches and feel amazing in your own skin, [click here to start the 8-Week Workout Program].


Comments
Post a Comment