13 No-Bake Thanksgiving Desserts to Save Your Oven Space
13 No-Bake Thanksgiving Desserts to Save Your Oven Space
Thanksgiving is all about gathering around the table and enjoying delicious food, but who wants to fight for oven space? Skip the baking hassle with these no-bake dessert ideas that are perfect for the holiday feast. From creamy cheesecakes to rich chocolate treats, these recipes will keep your guests happy without heating things up in the kitchen.
Irresistibly Creamy No-Bake Pumpkin Cheesecake
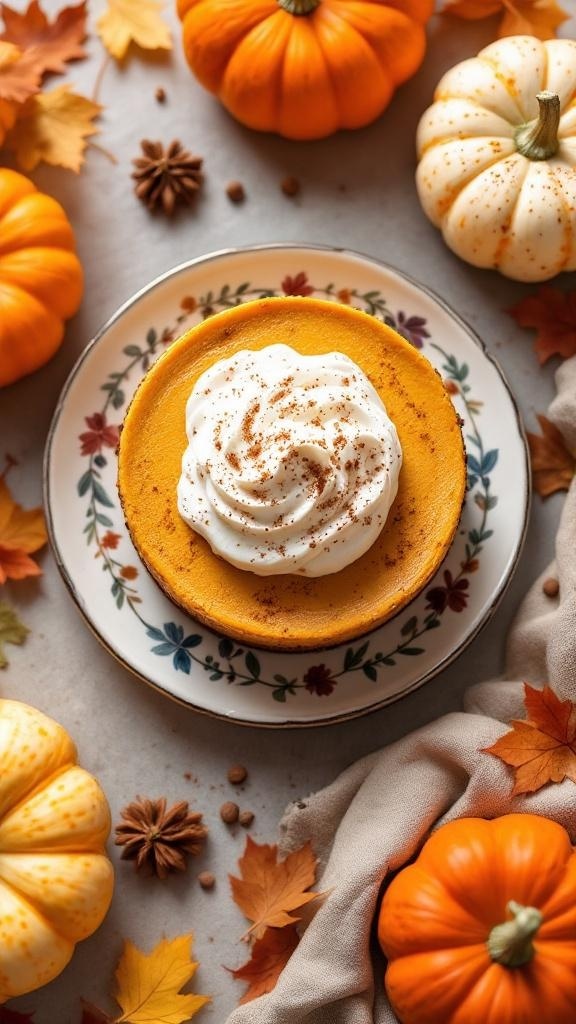
This no-bake pumpkin cheesecake is a delightful treat for Thanksgiving. It’s creamy, rich, and captures all the flavors of fall. The vibrant orange color of the cheesecake is a feast for the eyes, making it a perfect centerpiece for your dessert table. Topped with a dollop of whipped cream and a sprinkle of cinnamon, it’s sure to impress your guests.
The cheesecake sits beautifully on a decorative plate, surrounded by charming mini pumpkins and autumn leaves. This setup not only highlights the dessert but also adds a cozy, festive vibe to your gathering.
Making this cheesecake is simple and doesn’t require any baking, freeing up your oven for other holiday dishes. It’s a great way to enjoy the classic flavors of pumpkin pie without the hassle.
Ingredients
- 1 ½ cups graham cracker crumbs
- ½ cup unsalted butter, melted
- 2 cups cream cheese, softened
- 1 cup pumpkin puree
- 1 cup powdered sugar
- 1 teaspoon vanilla extract
- 1 teaspoon ground cinnamon
- ½ teaspoon ground nutmeg
- 1 cup heavy whipping cream
- Extra whipped cream for topping
- Ground cinnamon for garnish
Instructions
- Prepare the Crust: In a bowl, mix graham cracker crumbs and melted butter until combined. Press the mixture into the bottom of a 9-inch springform pan to form an even layer.
- Make the Filling: In a large bowl, beat the cream cheese until smooth. Add pumpkin puree, powdered sugar, vanilla, cinnamon, and nutmeg. Mix until well combined.
- Whip the Cream: In another bowl, whip the heavy cream until stiff peaks form. Gently fold the whipped cream into the pumpkin mixture until fully incorporated.
- Assemble: Pour the filling over the crust in the springform pan. Smooth the top with a spatula.
- Chill: Cover and refrigerate for at least 4 hours or overnight until set.
- Serve: Remove the cheesecake from the springform pan. Top with extra whipped cream and a sprinkle of cinnamon before slicing and serving.
Decadent Chocolate Mousse Cups For The Holidays
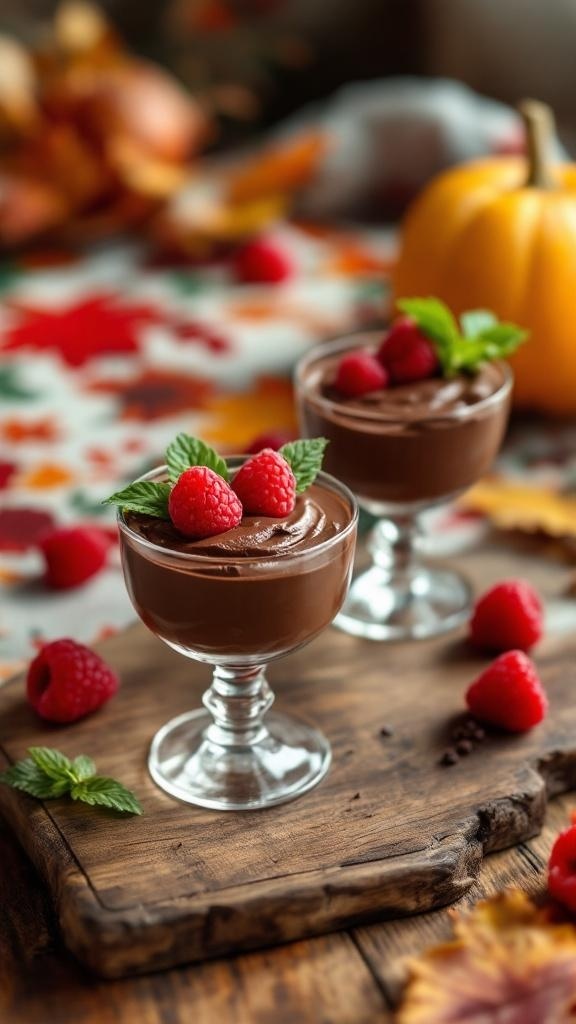
These chocolate mousse cups are a perfect treat for your Thanksgiving table. They look fancy but are super easy to make, giving you more time to enjoy the holiday with family and friends. The rich chocolate flavor paired with fresh raspberries and mint leaves creates a delightful contrast that everyone will love.
The mousse is light and airy, making it a great way to end a hearty meal without feeling too heavy. Plus, they don’t require any baking, which is a lifesaver when oven space is limited during the holidays. Serve them in cute cups for a charming presentation that will impress your guests.
Here’s how to whip up these delicious chocolate mousse cups:
Ingredients
- 1 cup heavy cream
- 1/2 cup semi-sweet chocolate chips
- 2 tablespoons sugar
- 1 teaspoon vanilla extract
- Fresh raspberries for topping
- Mint leaves for garnish
Instructions
- Melt the chocolate chips: In a microwave-safe bowl, heat the chocolate chips in 30-second intervals until smooth. Let it cool slightly.
- Whip the cream: In a mixing bowl, whip the heavy cream, sugar, and vanilla extract until soft peaks form.
- Combine: Gently fold the melted chocolate into the whipped cream until fully combined. Be careful not to deflate the mixture.
- Chill: Spoon the mousse into serving cups and refrigerate for at least 1 hour to set.
- Serve: Top with fresh raspberries and mint leaves just before serving. Enjoy!
Delightful No-Bake Apple Tart With Caramel Drizzle
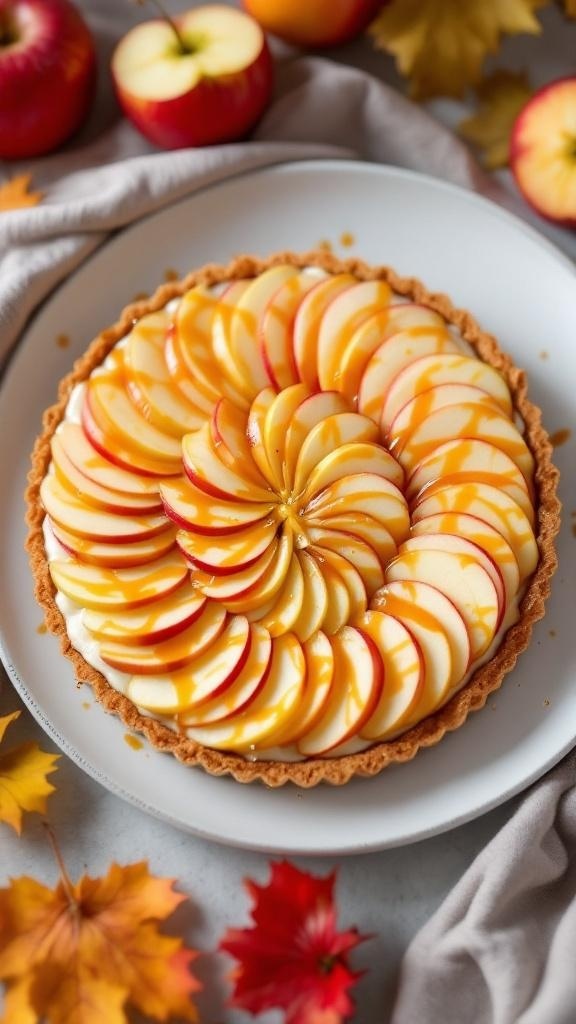
This no-bake apple tart is a showstopper for any Thanksgiving table. With its beautiful layers of thinly sliced apples, it not only looks stunning but tastes amazing too. The caramel drizzle adds a sweet touch that perfectly complements the tartness of the apples. Plus, it saves your oven space for all those other delicious dishes!
The crust is made from crushed cookies, giving it a delightful crunch that pairs well with the creamy filling. You can whip this up in no time, making it a great option for busy holiday preparations. Serve it chilled, and watch your guests enjoy every bite!
Ingredients
- 1 ½ cups crushed graham crackers
- ½ cup unsalted butter, melted
- 2 cups cream cheese, softened
- 1 cup powdered sugar
- 1 teaspoon vanilla extract
- 3-4 medium apples, thinly sliced
- ½ cup caramel sauce
- 1 tablespoon lemon juice
Instructions
- Prepare the Crust: In a bowl, mix crushed graham crackers and melted butter until well combined. Press the mixture into the bottom of a tart pan to form the crust. Chill in the refrigerator for about 30 minutes.
- Make the Filling: In another bowl, beat the cream cheese, powdered sugar, and vanilla extract until smooth and creamy. Spread this mixture evenly over the chilled crust.
- Slice the Apples: Toss the thinly sliced apples with lemon juice to prevent browning. Arrange the apple slices on top of the cream cheese filling in a circular pattern.
- Add the Caramel: Drizzle the caramel sauce over the arranged apples for that sweet finish.
- Chill and Serve: Refrigerate the tart for at least 1 hour before serving. Slice and enjoy this delightful no-bake dessert!
GET 21 QUICK & EASY LOW-CALORIE MEAL PLANS
Festive Pumpkin Pie Parfaits In Mason Jars
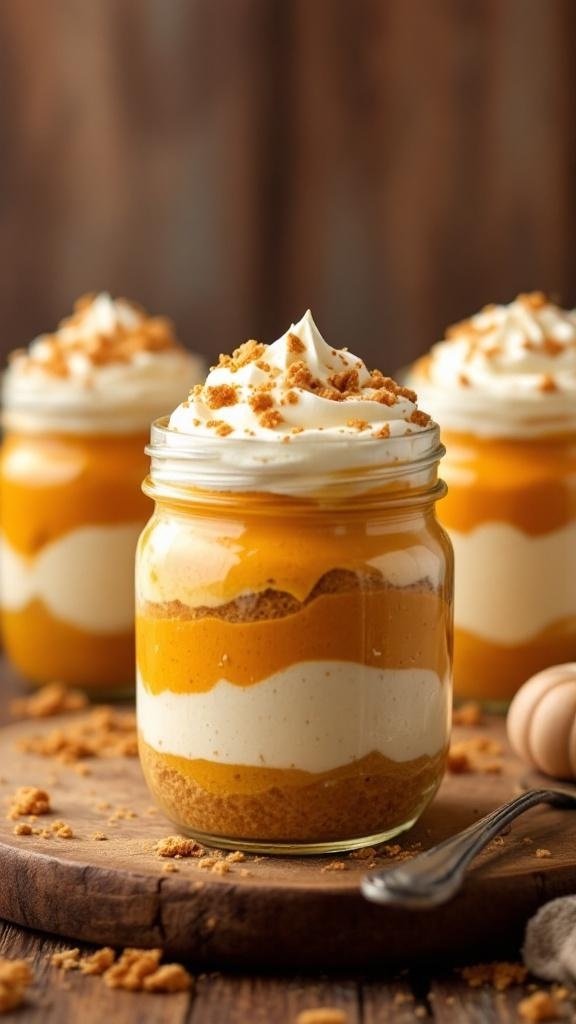
These pumpkin pie parfaits are a fun twist on the classic dessert. Layered in cute mason jars, they bring a festive vibe to your Thanksgiving table without taking up any oven space. The vibrant orange pumpkin filling contrasts beautifully with the creamy layers, making them as pleasing to the eye as they are to the palate.
Each jar is filled with a mix of pumpkin puree, cream cheese, and whipped cream, all sitting atop a crunchy graham cracker crust. The combination of flavors and textures is simply delightful. Plus, they are easy to assemble, making them a perfect choice for busy holiday prep.
To make these parfaits, you’ll need some simple ingredients. Gather your pumpkin puree, cream cheese, whipped cream, and graham crackers. The best part? You can prepare them ahead of time and store them in the fridge until it’s time to serve.
Ingredients
- 1 cup pumpkin puree
- 1 cup cream cheese, softened
- 1 cup whipped cream
- 1/2 cup powdered sugar
- 1 teaspoon pumpkin pie spice
- 1 cup graham cracker crumbs
- 2 tablespoons melted butter
- Extra whipped cream and graham cracker crumbs for topping
Instructions
- Prepare the Crust: In a bowl, mix graham cracker crumbs with melted butter until combined. Press the mixture into the bottom of each mason jar.
- Make the Pumpkin Layer: In another bowl, beat together pumpkin puree, cream cheese, powdered sugar, and pumpkin pie spice until smooth.
- Layer the Ingredients: Spoon a layer of the pumpkin mixture over the crust in each jar. Follow with a layer of whipped cream. Repeat the layers until the jars are filled, finishing with whipped cream on top.
- Chill: Cover the jars and refrigerate for at least 2 hours before serving. This helps the flavors meld together.
- Serve: Just before serving, add extra whipped cream and a sprinkle of graham cracker crumbs on top for a festive touch.
Coconut Cream Pie With A Twist For Thanksgiving
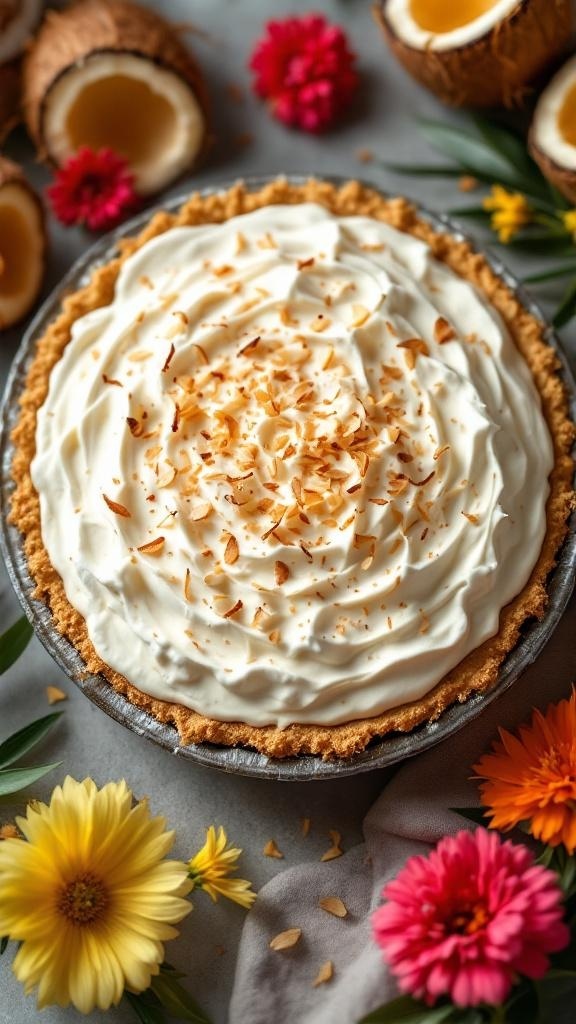
Coconut cream pie is a classic dessert, but this version adds a fun twist for Thanksgiving. The image showcases a beautifully crafted pie topped with fluffy whipped cream and toasted coconut flakes. Surrounding the pie are vibrant flowers and coconut shells, adding a festive touch to the presentation.
This no-bake dessert is perfect for those busy holiday kitchens. It allows you to save oven space while still impressing your guests with a delightful treat. The creamy coconut filling is rich and satisfying, making it a hit at any Thanksgiving gathering.
Let’s get to the recipe so you can whip this up in no time!
Ingredients
- 1 pre-made graham cracker crust
- 1 cup coconut milk
- 1 cup heavy cream
- 1/2 cup granulated sugar
- 1/4 cup cornstarch
- 1/4 teaspoon salt
- 1 teaspoon vanilla extract
- 1 cup shredded coconut (sweetened or unsweetened)
- Whipped cream for topping
- Toasted coconut flakes for garnish
Instructions
- Prepare the Filling: In a medium saucepan, whisk together coconut milk, sugar, cornstarch, and salt. Cook over medium heat, stirring constantly until the mixture thickens, about 5-7 minutes.
- Add Coconut and Vanilla: Once thickened, remove from heat and stir in shredded coconut and vanilla extract. Let it cool for a few minutes.
- Fill the Crust: Pour the coconut mixture into the graham cracker crust, smoothing it out evenly. Cover with plastic wrap and refrigerate for at least 4 hours, or until set.
- Top with Whipped Cream: Once set, remove the pie from the fridge and top with whipped cream. Sprinkle toasted coconut flakes on top for extra flavor and crunch.
- Serve and Enjoy: Slice the pie and serve it chilled. Your guests will love this refreshing twist on a Thanksgiving classic!
GET 8-WEEKS OF WORKOUTS TO LOSE INCHES
Luscious No-Bake Chocolate Peanut Butter Bars
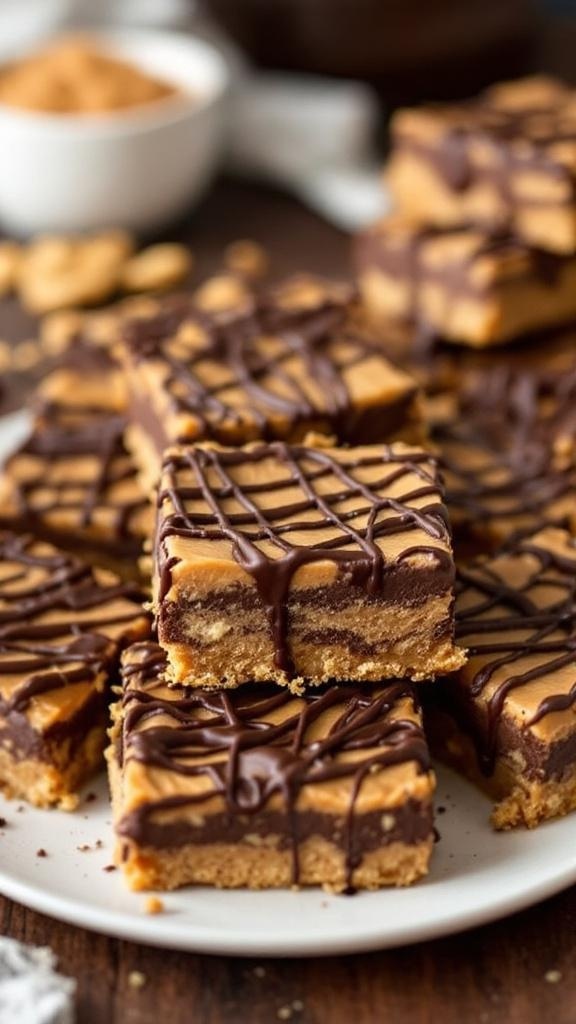
No-bake chocolate peanut butter bars are a fantastic way to satisfy your sweet tooth without heating up the kitchen. These bars are layered with a crunchy base, creamy peanut butter filling, and a rich chocolate topping. They look so inviting, stacked neatly on a plate, with a drizzle of chocolate adding a touch of elegance.
Perfect for Thanksgiving, these bars are a crowd-pleaser. They save oven space while still delivering that delicious dessert experience everyone loves. Plus, they’re super easy to make, so you can whip them up in no time!
Ingredients
- 1 cup graham cracker crumbs
- 1/2 cup unsalted butter, melted
- 1/2 cup powdered sugar
- 1 cup creamy peanut butter
- 1 cup semi-sweet chocolate chips
- 1 tablespoon coconut oil (optional)
Instructions
- Prepare the Base: In a bowl, mix graham cracker crumbs, melted butter, and powdered sugar until well combined. Press this mixture into the bottom of a greased 8x8 inch pan.
- Make the Peanut Butter Layer: In another bowl, mix peanut butter until smooth. Spread it evenly over the graham cracker base.
- Prepare the Chocolate Topping: Melt the chocolate chips with coconut oil in a microwave-safe bowl, stirring every 30 seconds until smooth. Pour the melted chocolate over the peanut butter layer and spread evenly.
- Chill: Refrigerate the bars for at least 2 hours until firm. Once set, cut into squares and serve.
Zesty Lemon Icebox Cake To Refresh Your Feast
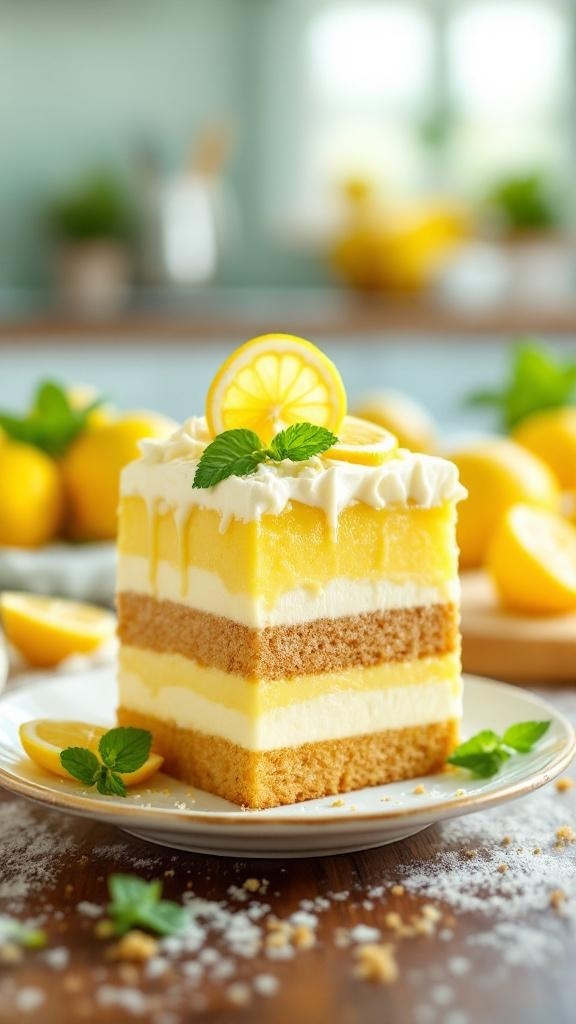
This Zesty Lemon Icebox Cake is a perfect addition to your Thanksgiving spread. With its bright, refreshing flavors, it offers a delightful contrast to heavier dishes. The layers of creamy lemon filling and soft cake create a light yet satisfying dessert that everyone will love.
The image showcases a beautifully layered icebox cake, topped with a slice of lemon and a sprig of mint. The vibrant yellow hues are inviting and evoke the freshness of lemons. This dessert not only looks stunning but also tastes amazing, making it a great choice for your holiday table.
Making this cake is simple and requires no baking, saving your oven space for the turkey and other dishes. Plus, it can be prepared ahead of time, allowing you to enjoy the festivities without stress.
Ingredients
- 1 package of lemon-flavored instant pudding mix
- 2 cups cold milk
- 1 cup heavy cream
- 1/4 cup powdered sugar
- 1 teaspoon vanilla extract
- 1 package of graham crackers
- 1/4 cup fresh lemon juice
- 1 tablespoon lemon zest
- Fresh lemon slices and mint leaves for garnish
Instructions
- In a bowl, whisk together the lemon pudding mix and cold milk until smooth. Let it sit for about 5 minutes to thicken.
- In another bowl, whip the heavy cream, powdered sugar, and vanilla extract until soft peaks form.
- Gently fold the whipped cream into the lemon pudding mixture. Add lemon juice and zest, mixing until combined.
- In a rectangular dish, layer graham crackers at the bottom. Spread a layer of the lemon filling over the crackers.
- Repeat the layers, finishing with the lemon filling on top. Cover and refrigerate for at least 4 hours, or overnight for best results.
- Before serving, garnish with fresh lemon slices and mint leaves. Cut into squares and enjoy!
Rich And Creamy No-Bake Cheesecake With Berry Topping
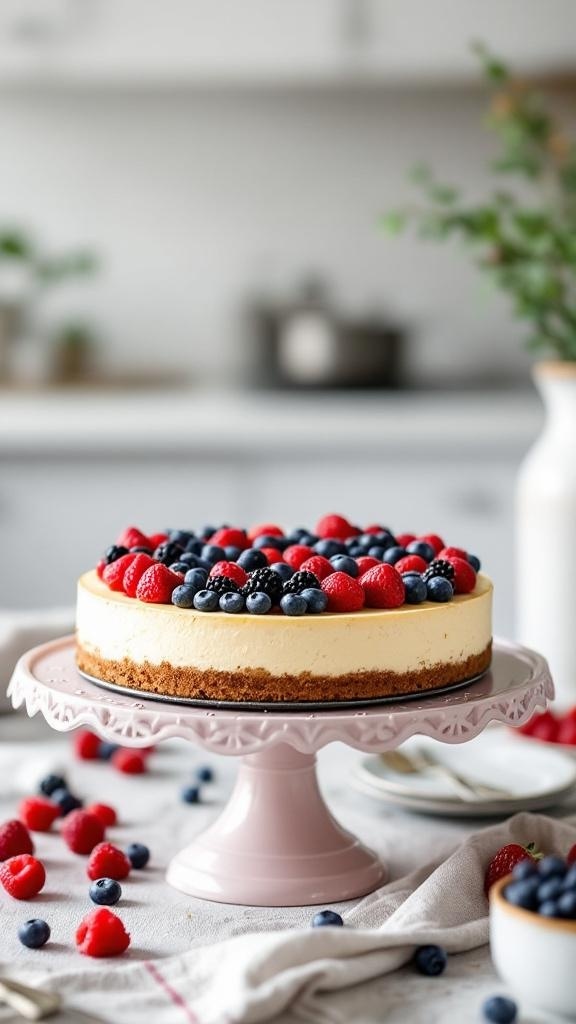
This rich and creamy no-bake cheesecake is a perfect dessert for Thanksgiving. It’s easy to make and won’t take up any oven space, allowing you to focus on other dishes. The cheesecake features a smooth, velvety texture that pairs beautifully with a colorful berry topping.
The base is made from crushed graham crackers mixed with melted butter, giving it a delightful crunch. The filling is a blend of cream cheese, sugar, and whipped cream, creating a light yet indulgent flavor. Topping it off with fresh raspberries and blueberries not only adds a pop of color but also a refreshing taste that balances the richness of the cheesecake.
This dessert is sure to impress your guests and is simple enough for anyone to make. Plus, it can be prepared a day in advance, making it a stress-free option for your holiday gathering.
Ingredients
- 1 ½ cups graham cracker crumbs
- ½ cup unsalted butter, melted
- 2 cups cream cheese, softened
- 1 cup powdered sugar
- 1 teaspoon vanilla extract
- 1 ½ cups heavy whipping cream
- 1 cup fresh raspberries
- 1 cup fresh blueberries
Instructions
- Prepare the Crust: In a bowl, mix graham cracker crumbs and melted butter until combined. Press the mixture into the bottom of a 9-inch springform pan to form an even layer.
- Make the Filling: In a large bowl, beat the cream cheese until smooth. Gradually add powdered sugar and vanilla extract, mixing until well combined.
- Whip the Cream: In another bowl, whip the heavy cream until stiff peaks form. Gently fold the whipped cream into the cream cheese mixture until fully incorporated.
- Assemble the Cheesecake: Pour the filling over the crust in the springform pan. Smooth the top with a spatula and refrigerate for at least 4 hours or overnight until set.
- Top and Serve: Before serving, arrange the fresh raspberries and blueberries on top of the cheesecake. Slice and enjoy your delicious no-bake cheesecake!
Classic No-Bake Fruitcake For A Modern Twist
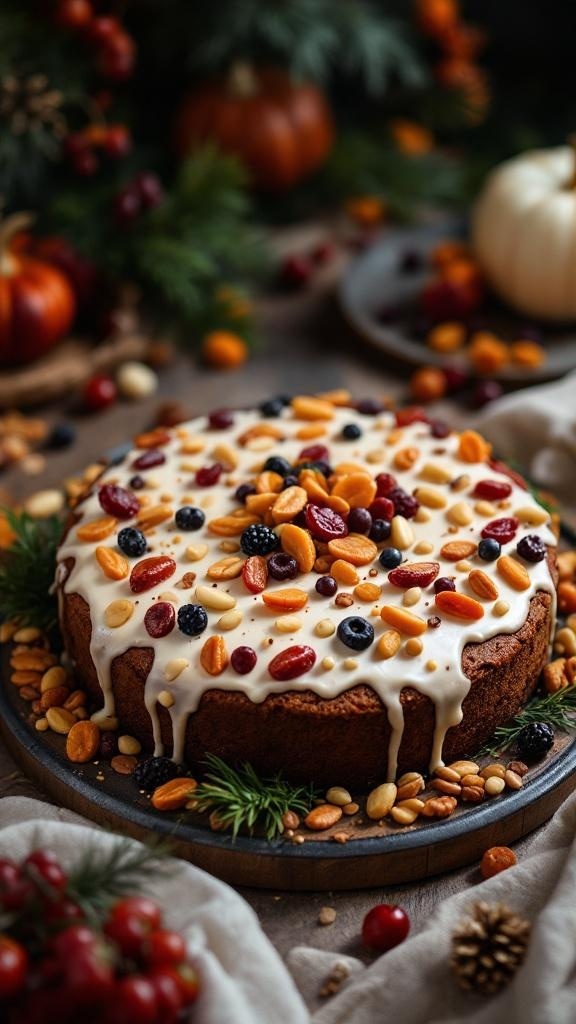
Fruitcake often gets a bad rap, but this no-bake version is here to change that! Imagine a cake that combines the rich flavors of dried fruits and nuts, topped with a creamy glaze. This dessert not only looks beautiful but also tastes amazing. Perfect for Thanksgiving, it will surely impress your guests while saving you precious oven space.
The image showcases a stunning fruitcake adorned with a variety of colorful dried fruits and nuts. The creamy icing drapes over the cake, making it a centerpiece on any holiday table. Surrounding the cake are festive decorations, including pine branches and seasonal fruits, adding to the cozy vibe of Thanksgiving.
Making this no-bake fruitcake is simple and fun. You can customize it with your favorite dried fruits and nuts. Plus, it’s a great way to use up any leftover ingredients from your holiday baking. Let’s get into the recipe!
Ingredients
- 2 cups mixed dried fruits (raisins, cranberries, apricots)
- 1 cup mixed nuts (almonds, walnuts, pecans)
- 1 cup graham cracker crumbs
- 1/2 cup unsweetened coconut flakes
- 1/2 cup honey or maple syrup
- 1 teaspoon vanilla extract
- 1/2 cup cream cheese, softened
- 1 cup powdered sugar
- 1 tablespoon lemon juice
Instructions
- Prepare the Base: In a large bowl, mix the dried fruits, nuts, graham cracker crumbs, and coconut flakes.
- Add Sweetness: Pour in the honey or maple syrup and vanilla extract. Stir until everything is well combined.
- Form the Cake: Press the mixture into a greased cake pan, ensuring it's packed tightly. Refrigerate for at least 2 hours to set.
- Make the Glaze: In a separate bowl, beat the cream cheese, powdered sugar, and lemon juice until smooth.
- Top the Cake: Once the fruitcake is set, remove it from the pan and spread the glaze over the top. Decorate with extra dried fruits and nuts if desired.
- Chill and Serve: Place the cake back in the fridge for another hour before slicing. Enjoy your no-bake fruitcake!
Chilled Raspberry Cheesecake Bites For A Sweet Finish

Looking for a delightful way to end your Thanksgiving feast? Chilled raspberry cheesecake bites are the perfect solution! These little treats are not only easy to make, but they also add a pop of color and flavor to your dessert table. With a creamy cheesecake filling and a tangy raspberry topping, they’re sure to impress your guests.
These bites are served cold, making them a refreshing option after a hearty meal. Plus, they’re bite-sized, so everyone can enjoy them without feeling too full. The combination of the smooth cheesecake and the tart raspberry creates a delicious balance that will leave everyone wanting more.
Let’s get to the fun part! Here’s how you can whip up these tasty treats:
Ingredients
- 1 cup graham cracker crumbs
- 1/4 cup granulated sugar
- 1/2 cup unsalted butter, melted
- 16 oz cream cheese, softened
- 1/2 cup powdered sugar
- 1 teaspoon vanilla extract
- 1 cup fresh raspberries
- 1/4 cup raspberry jam
Instructions
- Prepare the Crust: In a bowl, mix graham cracker crumbs, granulated sugar, and melted butter until well combined. Press the mixture into the bottom of mini muffin tins to form a crust.
- Make the Filling: In another bowl, beat the softened cream cheese, powdered sugar, and vanilla extract until smooth and creamy. Spoon the filling over the crusts in the muffin tins.
- Chill: Place the filled muffin tins in the refrigerator for at least 2 hours to set.
- Top with Raspberries: Once set, remove from the fridge and top each cheesecake bite with fresh raspberries and a dollop of raspberry jam.
- Serve: Carefully remove the cheesecake bites from the muffin tins and serve chilled. Enjoy!
No-Bake Chocolate Chip Cookie Dough Dip For Sharing
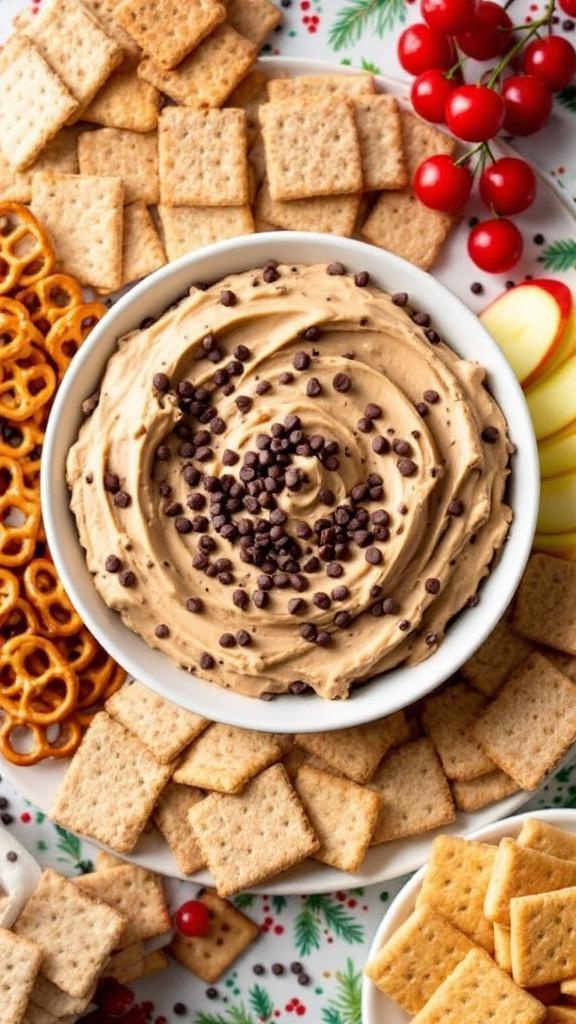
This No-Bake Chocolate Chip Cookie Dough Dip is a fun and easy treat that everyone will love. Perfect for Thanksgiving, it allows you to save oven space while still offering a delicious dessert option. The dip is creamy, sweet, and packed with chocolate chips, making it a crowd-pleaser at any gathering.
In the image, you can see a bowl filled with the cookie dough dip, topped with mini chocolate chips. Surrounding the bowl are various dippers like graham crackers, pretzels, and apple slices. This colorful spread invites everyone to dig in and enjoy a delightful snack.
Making this dip is a breeze. You just mix together a few simple ingredients, and you’ll have a tasty dessert ready to serve in no time. It’s perfect for sharing with family and friends, and it’s sure to be a hit!
Ingredients
- 1 cup unsalted butter, softened
- 1 cup brown sugar, packed
- 1/2 cup granulated sugar
- 2 teaspoons vanilla extract
- 2 cups all-purpose flour
- 1 can sweetened condensed milk
- 1 cup mini chocolate chips
- Graham crackers, pretzels, and apple slices for dipping
Instructions
- In a large bowl, beat the softened butter with brown sugar and granulated sugar until creamy.
- Add the vanilla extract and mix until well combined.
- Gradually add the flour, mixing until fully incorporated.
- Pour in the sweetened condensed milk and stir until smooth.
- Fold in the mini chocolate chips.
- Transfer the dip to a serving bowl and top with extra chocolate chips if desired.
- Serve with graham crackers, pretzels, and apple slices for dipping.
Savory No-Bake Pumpkin Spice Energy Bites

These no-bake pumpkin spice energy bites are the perfect treat for Thanksgiving. They are easy to make and require no oven space, which is a win during the busy holiday season. Each bite is packed with pumpkin flavor and a hint of spice, making them a delightful addition to your dessert table.
The energy bites are rolled in coconut, giving them a fun texture and a touch of sweetness. Plus, they’re healthy enough to enjoy guilt-free! With a mix of oats, nut butter, and pumpkin puree, these bites are not just tasty but also nutritious.
Gather your ingredients and get ready to whip up these delicious treats. They’re great for snacking or as a sweet finish to your Thanksgiving meal.
Ingredients
- 1 cup rolled oats
- 1/2 cup pumpkin puree
- 1/4 cup nut butter (like almond or peanut)
- 1/4 cup honey or maple syrup
- 1 teaspoon pumpkin spice
- 1/4 cup shredded coconut (for rolling)
- 1/4 cup chocolate chips (optional)
Instructions
- Mix Ingredients: In a large bowl, combine rolled oats, pumpkin puree, nut butter, honey, and pumpkin spice. Stir until well combined.
- Chill the Mixture: Cover the bowl and refrigerate the mixture for about 30 minutes. This makes it easier to roll into balls.
- Form the Bites: Once chilled, scoop out small amounts of the mixture and roll them into balls, about 1 inch in diameter.
- Coat with Coconut: Roll each ball in shredded coconut until fully coated.
- Store: Place the energy bites in an airtight container and store in the fridge for up to a week. Enjoy!
Alluring No-Bake Tiramisu Cups For Italian Flair
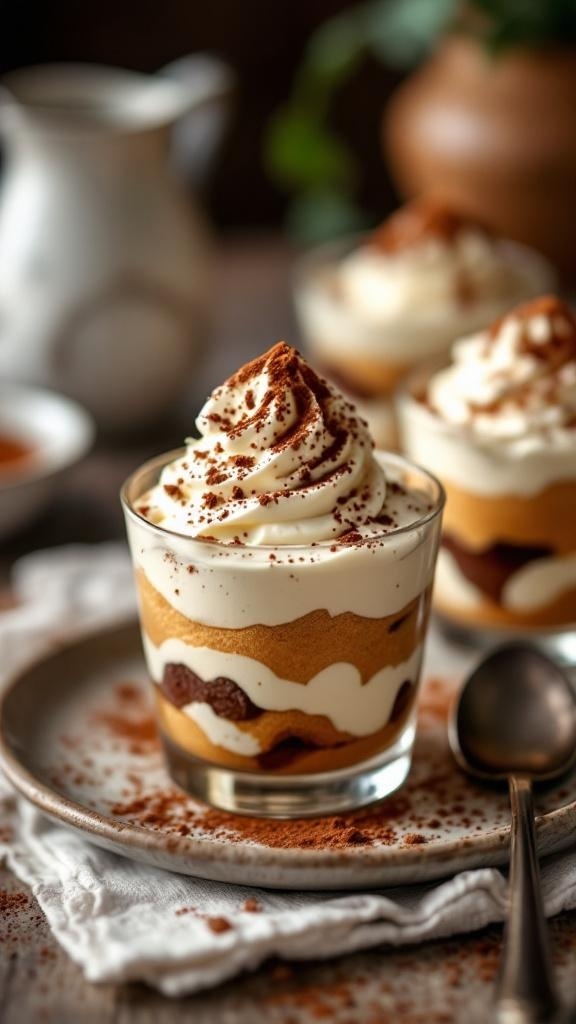
No-bake tiramisu cups are a delightful way to bring a taste of Italy to your Thanksgiving table. These charming desserts are layered with creamy mascarpone, coffee-soaked ladyfingers, and a sprinkle of cocoa powder. They not only look stunning but also offer a rich flavor that everyone will love.
The image showcases these elegant cups, topped with a generous swirl of whipped cream and a dusting of cocoa. The layers of coffee and cream create a beautiful contrast, making them a feast for the eyes as well as the palate. Plus, they’re served in individual cups, making them perfect for sharing without the mess.
Making these tiramisu cups is a breeze. You won’t need to turn on the oven, saving valuable space for your other Thanksgiving dishes. Just whip up the ingredients, layer them in cups, and let them chill. They’re the perfect sweet ending to your holiday meal!
Struggling to Stay on Track with Your Eating?
You’re not alone. One of the biggest obstacles I see people
face is not knowing what to eat. Between busy schedules, endless diet
advice online, and trying to cook healthy meals that actually taste good—it’s
easy to feel stuck or overwhelmed.
That’s why I created my 21 Quick & Easy Custom
Low-Calorie Meal Plans Program. These plans are built specifically for
you—your goals, your lifestyle, and your food preferences. You won’t find
any cookie-cutter diets here. Just real, satisfying meals that help you stay
full, energized, and on track without the stress.
✅ No more guessing.
✅
No more skipping meals or eating “diet food” you hate.
✅
Just a clear, doable plan that fits your life.
👉 Ready to eat better,
feel better, and finally make progress? [Click here to get your custom meal plans today.]
Not Seeing the Inches Drop No Matter What You Do?
If you’re working out but still not seeing the results in
the mirror, I hear you. So many people come to me after months of doing cardio
or random workouts—and still struggling to lose inches or tone up. The truth
is, your body needs more than just movement. It needs a proven strategy.
My 8-Week Workout Program to Lose Inches is designed
to do just that—burn fat, tighten up, and give you visible results.
These workouts are fun, effective, and designed for real people with real
lives. Whether you’re getting back into fitness or ready to take it to the next
level, this program gives you a clear path to success.
✅ Just 8 weeks to build strength,
confidence, and a fitter shape.
✅
No endless cardio.
✅
No gym required (unless you want it).
👉 If you're ready to
drop inches and feel amazing in your own skin, [click here to start the 8-Week Workout Program].


Comments
Post a Comment