15 Foolproof Thanksgiving Desserts for Beginners
15 Foolproof Thanksgiving Desserts for Beginners
Thanksgiving is the perfect time to sweeten the celebration with delightful desserts, and this collection of foolproof recipes makes it a breeze. Whether you’re new to baking or just looking for simple, scrumptious ideas to impress your family and friends, these treats are designed to help you succeed every time. Get ready for a festive feast that ends on a high note!
Indulge In The Classic Pumpkin Pie: A Timeless Thanksgiving Favorite
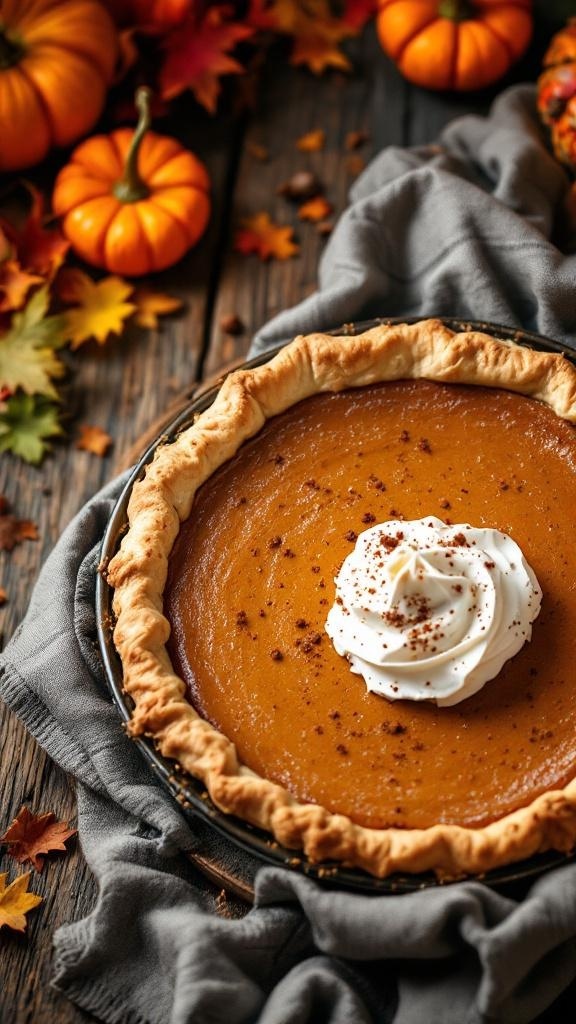
When you think of Thanksgiving desserts, pumpkin pie often comes to mind. This classic treat is a staple on many holiday tables. Its creamy filling and flaky crust create a delightful combination that everyone loves.
The image captures a beautifully baked pumpkin pie, topped with a swirl of whipped cream and a sprinkle of spice. The warm tones of the pie contrast nicely with the rustic wooden background and colorful autumn leaves. Mini pumpkins add a festive touch, reminding us of the season.
Making pumpkin pie is easier than you might think. With just a few simple ingredients, you can create a dessert that will impress your family and friends. Let’s get started on this foolproof recipe!
Delight Your Guests With Easy Apple Crisp: A Warm And Cozy Treat
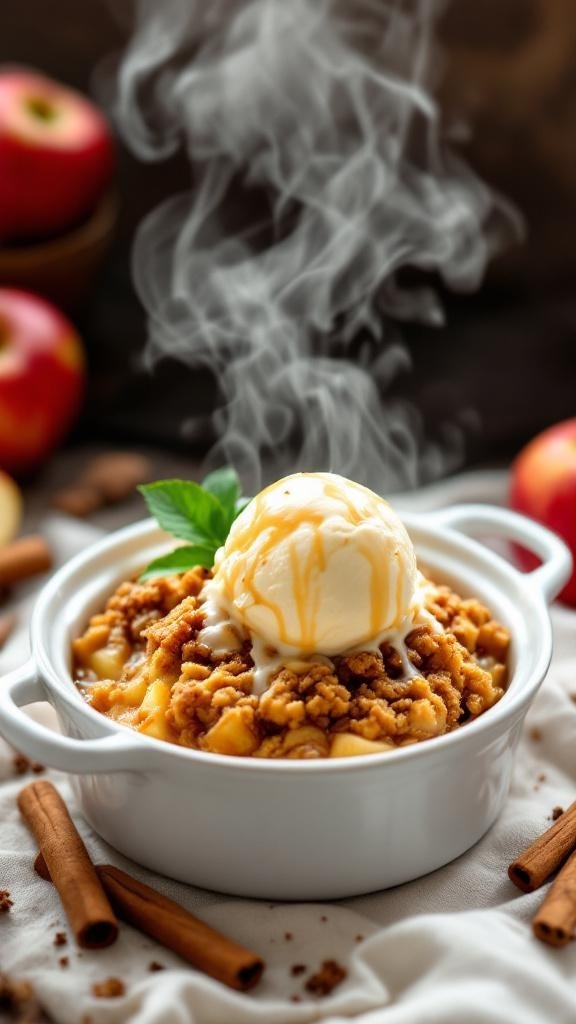
Apple crisp is a classic dessert that brings warmth and comfort to any Thanksgiving table. This dish features tender, spiced apples topped with a crunchy oat topping. It’s simple to make and sure to impress your guests.
The image showcases a steaming bowl of apple crisp, topped with a scoop of vanilla ice cream and a drizzle of caramel sauce. The warm, golden-brown topping contrasts beautifully with the fresh apples underneath. Surrounding the bowl are cinnamon sticks and fresh apples, adding to the cozy vibe.
Making apple crisp is straightforward. You’ll need just a few ingredients, and the steps are easy to follow. This dessert is perfect for beginners and can be whipped up in no time.
Ingredients
- 6 cups peeled and sliced apples (Granny Smith or Honeycrisp work well)
- 1 cup granulated sugar
- 1 teaspoon ground cinnamon
- 1 tablespoon lemon juice
- 1 cup rolled oats
- 1 cup all-purpose flour
- 1/2 cup packed brown sugar
- 1/2 cup unsalted butter, softened
- 1/4 teaspoon salt
Instructions
- Preheat your oven to 350°F (175°C).
- In a large bowl, mix the sliced apples with granulated sugar, cinnamon, and lemon juice. Spread this mixture evenly in a greased baking dish.
- In another bowl, combine oats, flour, brown sugar, softened butter, and salt. Mix until crumbly.
- Sprinkle the oat mixture over the apples.
- Bake for 30-35 minutes, or until the topping is golden brown and the apples are bubbly.
- Serve warm, topped with vanilla ice cream and a drizzle of caramel sauce if desired.
Savor The Richness Of Pecan Pie: A Southern Classic
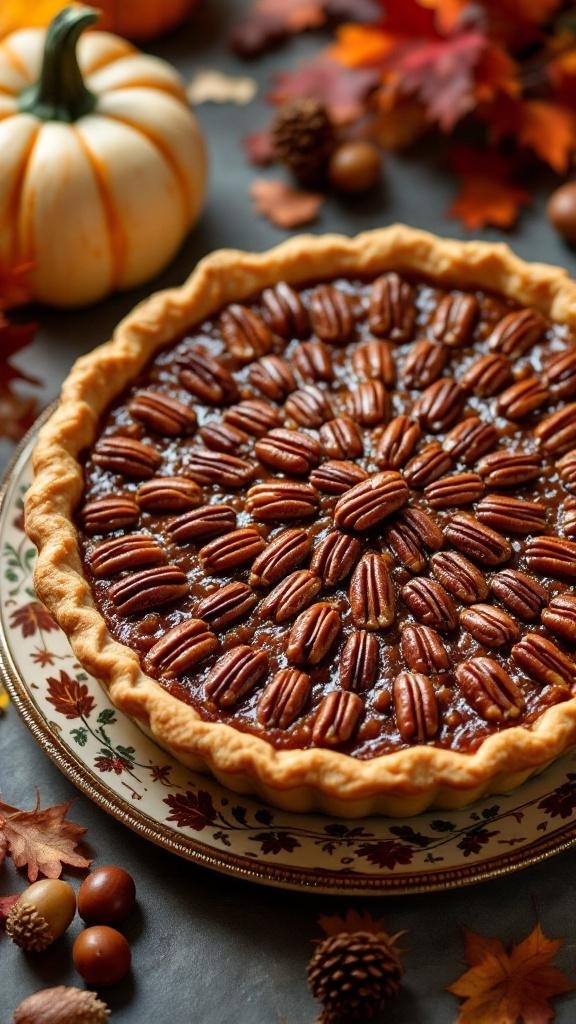
Pecan pie is a true Southern classic that brings warmth and comfort to any Thanksgiving table. Its rich, sweet filling and crunchy pecans make it a favorite for many. The golden crust cradles the gooey filling, creating a delightful contrast in textures. This pie is not just a dessert; it’s a tradition that many families cherish.
When you look at a pecan pie, you see a beautiful arrangement of pecans on top, glistening with syrup. The colors of the pie, from the golden crust to the deep brown filling, evoke the essence of fall. It’s a dish that not only tastes great but also looks stunning, making it a centerpiece for your holiday feast.
Making pecan pie is easier than you might think. With just a few simple ingredients, you can create a dessert that impresses everyone. Whether you’re a beginner or a seasoned baker, this recipe will guide you through each step.
Ingredients
- 1 unbaked pie crust
- 1 cup corn syrup
- 1 cup brown sugar
- 1/3 cup unsalted butter, melted
- 3 large eggs
- 1 teaspoon vanilla extract
- 1 1/2 cups pecan halves
Instructions
- Preheat your oven to 350°F (175°C).
- In a large bowl, mix together corn syrup, brown sugar, melted butter, eggs, and vanilla extract until smooth.
- Stir in the pecan halves, ensuring they are evenly coated with the mixture.
- Pour the filling into the unbaked pie crust, spreading the pecans evenly on top.
- Bake in the preheated oven for 60-70 minutes, or until the filling is set and the top is golden brown.
- Allow the pie to cool before slicing. Serve with whipped cream or vanilla ice cream for an extra treat!
GET 21 QUICK & EASY LOW-CALORIE MEAL PLANS
Experience The Sweetness Of Chocolate Cream Pie: A Decadent Delight
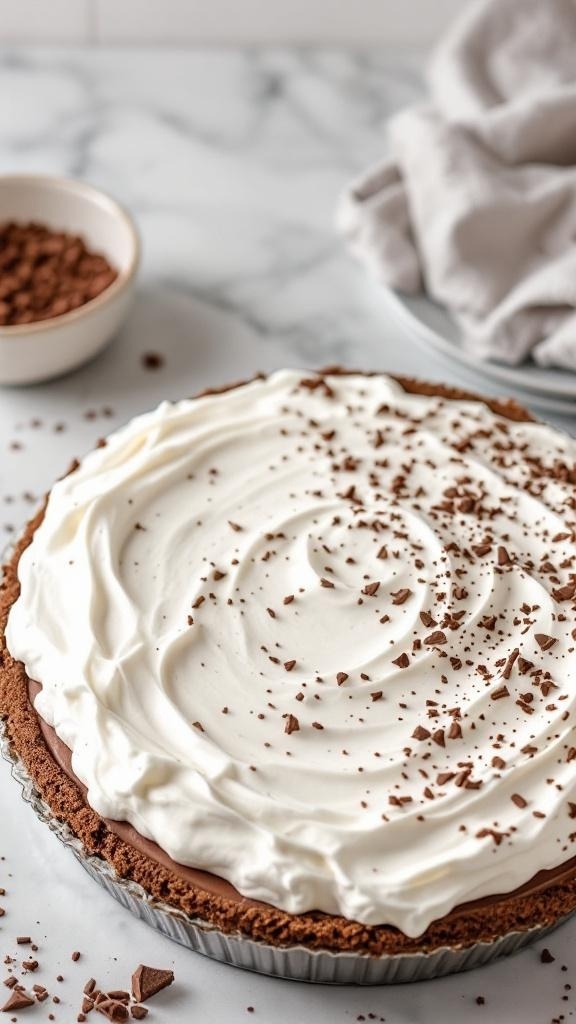
Chocolate cream pie is a classic dessert that never fails to impress. With its rich chocolate filling and fluffy whipped cream topping, it’s a treat that brings smiles all around the table. The image captures a beautifully crafted pie, showcasing a smooth layer of chocolate beneath a generous swirl of whipped cream. Topped with chocolate shavings, it looks as good as it tastes!
This pie is perfect for Thanksgiving or any gathering. It’s simple to make, even for beginners, and requires just a few ingredients. You can whip it up in no time and have a show-stopping dessert that everyone will love.
Ingredients
- 1 pre-made chocolate pie crust
- 1 cup heavy cream
- 1/2 cup granulated sugar
- 1/4 cup unsweetened cocoa powder
- 2 cups milk
- 1/4 cup cornstarch
- 1 teaspoon vanilla extract
- 1/4 teaspoon salt
- Chocolate shavings for garnish
Instructions
- Prepare the Filling: In a saucepan, mix the sugar, cocoa powder, cornstarch, and salt. Gradually whisk in the milk until smooth. Cook over medium heat, stirring constantly until the mixture thickens and starts to bubble.
- Add Flavor: Remove from heat and stir in the vanilla extract. Pour the chocolate filling into the pre-made pie crust and let it cool to room temperature.
- Make the Whipped Cream: In a mixing bowl, beat the heavy cream and sugar until soft peaks form. Spread the whipped cream over the cooled chocolate filling.
- Garnish: Top with chocolate shavings for an extra touch. Chill the pie in the refrigerator for at least 2 hours before serving.
Enjoy this delightful chocolate cream pie at your Thanksgiving feast!
Embrace The Simplicity Of No-Bake Cheesecake: Quick And Delicious
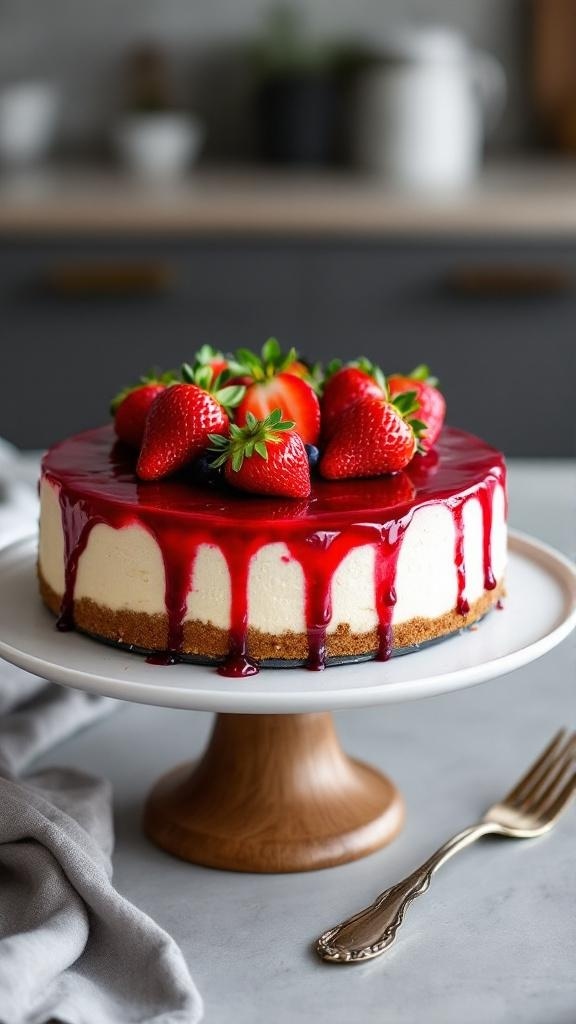
No-bake cheesecake is a fantastic option for Thanksgiving desserts. It’s quick, easy, and always a crowd-pleaser. The image shows a beautiful cheesecake topped with fresh strawberries and a glossy berry sauce. The creamy filling and crumbly crust make it a delightful treat that requires no baking at all!
This dessert is perfect for beginners. You don’t need to worry about oven temperatures or timing. Just mix your ingredients, pour them into a crust, and let it chill. The result is a smooth, rich cheesecake that everyone will love.
Let’s get started on making this delicious no-bake cheesecake!
Ingredients
- 1 ½ cups graham cracker crumbs
- ½ cup unsalted butter, melted
- 2 cups cream cheese, softened
- 1 cup powdered sugar
- 1 teaspoon vanilla extract
- 1 cup heavy whipping cream
- 1 cup fresh strawberries, for topping
- ½ cup berry sauce (store-bought or homemade)
Instructions
- Make the Crust: In a bowl, mix graham cracker crumbs and melted butter until combined. Press this mixture into the bottom of a springform pan to form a crust.
- Prepare the Filling: In another bowl, beat the softened cream cheese until smooth. Gradually add powdered sugar and vanilla extract, mixing until well combined.
- Whip the Cream: In a separate bowl, whip the heavy cream until stiff peaks form. Gently fold this into the cream cheese mixture until fully incorporated.
- Combine: Pour the filling over the crust in the springform pan. Smooth the top with a spatula.
- Chill: Cover and refrigerate for at least 4 hours, or overnight if possible, to let it set.
- Serve: Once set, remove the cheesecake from the springform pan. Top with fresh strawberries and drizzle with berry sauce before serving.
Create Joy With Sweet Potato Pie: A Southern Comfort Dish
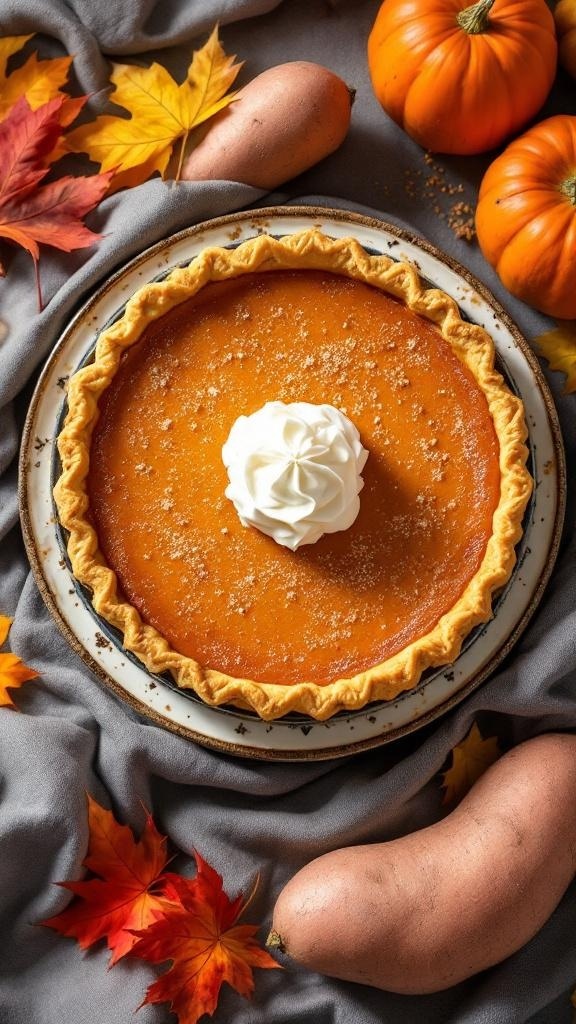
Sweet potato pie is a classic dessert that brings warmth and comfort to any Thanksgiving table. Its rich, creamy filling and flaky crust make it a favorite among many. The image perfectly captures this delightful pie, topped with a swirl of whipped cream and surrounded by vibrant autumn leaves and pumpkins. This scene evokes the cozy feelings of the holiday season.
Making sweet potato pie is simpler than you might think. With just a few ingredients, you can create a dessert that impresses everyone. The combination of sweet potatoes, spices, and a buttery crust creates a flavor that is both nostalgic and satisfying.
To get started, gather your ingredients. You’ll need fresh sweet potatoes, sugar, eggs, milk, vanilla extract, and spices like cinnamon and nutmeg. The process involves baking the sweet potatoes, mashing them, and mixing everything together. Pour the mixture into a prepared pie crust and bake until set.
This pie not only tastes amazing but also fills your home with a wonderful aroma. It’s a dish that brings people together, making it perfect for sharing with family and friends during the holidays.
Ingredients
- 2 cups sweet potatoes, cooked and mashed
- 1 cup granulated sugar
- 2 large eggs
- 1/2 cup milk
- 1 teaspoon vanilla extract
- 1 teaspoon ground cinnamon
- 1/2 teaspoon ground nutmeg
- 1/4 teaspoon salt
- 1 unbaked pie crust
Instructions
- Preheat your oven to 350°F (175°C).
- In a large bowl, combine the mashed sweet potatoes, sugar, eggs, milk, vanilla extract, cinnamon, nutmeg, and salt. Mix until smooth.
- Pour the sweet potato mixture into the unbaked pie crust, spreading it evenly.
- Bake in the preheated oven for 45-50 minutes, or until the filling is set and a knife inserted in the center comes out clean.
- Let the pie cool before serving. Top with whipped cream if desired.
Relish The Flavor Of Cranberry Sauce Dessert Bars: A Tart And Sweet Treat
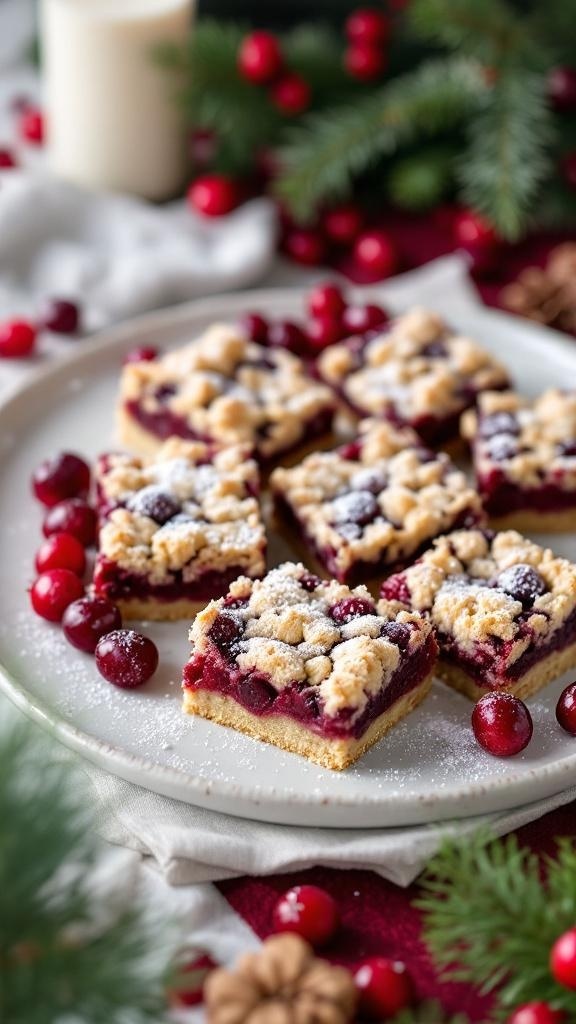
Cranberry sauce dessert bars are a delightful way to enjoy the tartness of cranberries in a sweet treat. These bars are not only visually appealing but also packed with flavor. The rich, buttery crust pairs perfectly with the tangy cranberry filling, making each bite a burst of deliciousness.
In the image, you can see beautifully arranged cranberry sauce dessert bars, topped with a crumbly streusel. The vibrant red of the cranberries contrasts beautifully with the golden crust, making it a perfect addition to your Thanksgiving table. The light dusting of powdered sugar adds a touch of elegance, inviting everyone to dig in.
These bars are easy to make and are sure to impress your guests. They can be prepared ahead of time, allowing you to enjoy more time with family and friends during the holiday. The combination of tart and sweet flavors makes them a crowd favorite.
Ingredients
- 1 cup all-purpose flour
- 1/2 cup unsalted butter, softened
- 1/4 cup granulated sugar
- 1/2 teaspoon vanilla extract
- 1 cup cranberry sauce (homemade or store-bought)
- 1/2 cup brown sugar, packed
- 1/2 teaspoon cinnamon
- 1/4 cup rolled oats
- 1/4 cup chopped nuts (optional)
- Powdered sugar for dusting
Instructions
- Preheat the oven to 350°F (175°C). Grease an 8x8-inch baking dish.
- In a bowl, mix flour, softened butter, granulated sugar, and vanilla until crumbly. Press this mixture into the bottom of the prepared dish to form the crust.
- Spread the cranberry sauce evenly over the crust.
- In another bowl, combine brown sugar, cinnamon, oats, and nuts. Sprinkle this mixture over the cranberry layer.
- Bake for 25-30 minutes, or until the topping is golden brown.
- Let cool completely before cutting into bars. Dust with powdered sugar before serving.
GET 8-WEEKS OF WORKOUTS TO LOSE INCHES
Indulge In The Creaminess Of Coconut Cream Pie: A Tropical Twist
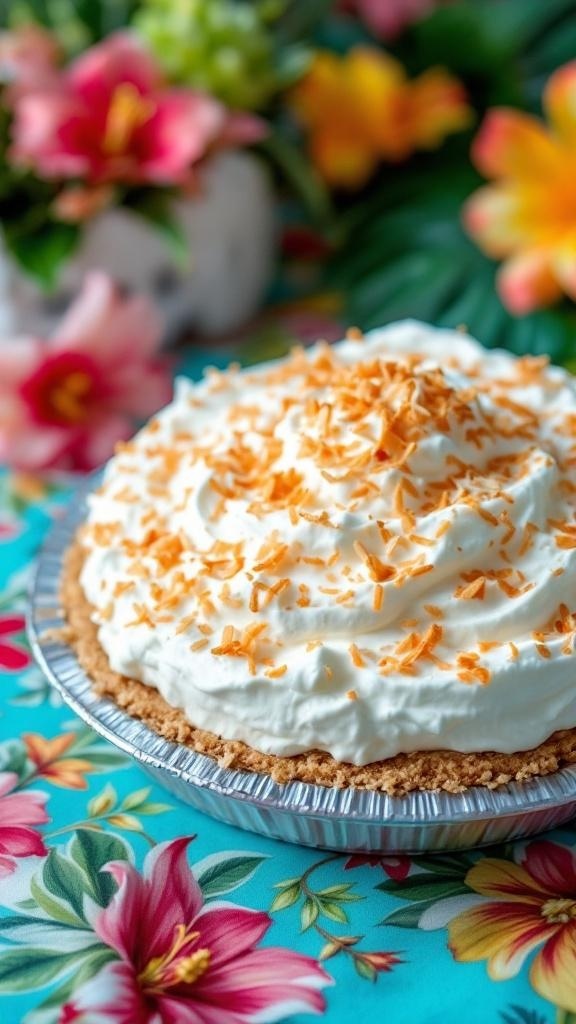
Coconut cream pie is a delightful treat that brings a taste of the tropics right to your Thanksgiving table. With its smooth, creamy filling and a crunchy crust, this pie is a crowd-pleaser. The fluffy whipped topping and toasted coconut flakes add a perfect finishing touch, making it look as good as it tastes.
The vibrant colors in the image highlight the pie's inviting nature. The creamy white filling contrasts beautifully with the golden-brown crust and the bright orange coconut flakes. This dessert not only satisfies your sweet tooth but also adds a cheerful vibe to your holiday spread.
Making coconut cream pie is easier than you might think. With just a few simple ingredients, you can whip up a dessert that feels special without the stress. Let’s get started on this delicious recipe!
Ingredients
- 1 pre-made pie crust (9-inch)
- 1 cup sweetened shredded coconut
- 2 cups whole milk
- 3/4 cup granulated sugar
- 1/4 cup cornstarch
- 1/4 teaspoon salt
- 3 large egg yolks
- 2 tablespoons unsalted butter
- 1 teaspoon vanilla extract
- 1 cup heavy whipping cream
- 2 tablespoons powdered sugar
- Extra toasted coconut for garnish
Instructions
- Prepare the Crust: Bake the pie crust according to package instructions until golden brown. Let it cool completely.
- Make the Filling: In a medium saucepan, mix sugar, cornstarch, and salt. Gradually whisk in milk. Cook over medium heat, stirring constantly until the mixture thickens and bubbles. Remove from heat.
- Add Egg Yolks: In a small bowl, whisk the egg yolks. Slowly add a bit of the hot mixture to the yolks to temper them, then whisk the yolks back into the saucepan. Cook for another 2 minutes, then stir in butter, vanilla, and shredded coconut.
- Cool the Filling: Pour the filling into the cooled pie crust. Cover with plastic wrap and refrigerate for at least 4 hours or until set.
- Make the Topping: In a mixing bowl, beat the heavy cream and powdered sugar until soft peaks form. Spread over the chilled pie and sprinkle with toasted coconut before serving.
Enjoy The Rich Flavor Of Carrot Cake: A Moist And Spicy Dessert
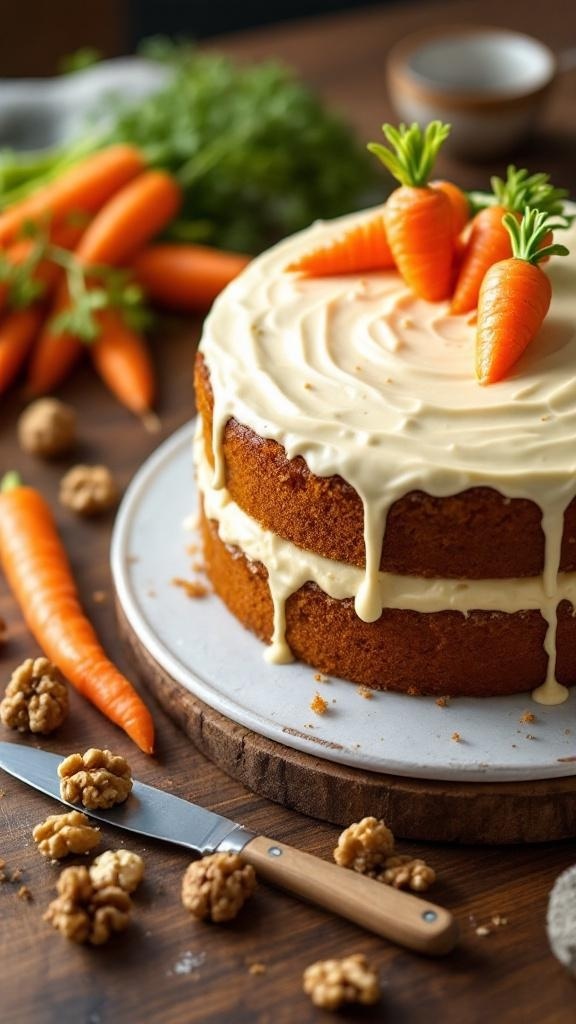
Carrot cake is a classic dessert that brings warmth and comfort to any Thanksgiving table. Its moist texture and spicy flavor make it a favorite among many. The image shows a beautifully layered carrot cake topped with cream cheese frosting and adorned with cute little carrot decorations. Surrounding the cake are fresh carrots and walnuts, hinting at the delicious ingredients that make this dessert so special.
This cake is not only tasty but also easy to make. The combination of spices like cinnamon and nutmeg, along with the sweetness of carrots, creates a delightful flavor profile. Plus, it’s a great way to sneak in some veggies!
Whether you’re a beginner or a seasoned baker, this carrot cake recipe is foolproof and sure to impress your guests. Let’s get started!
Ingredients
- 2 cups all-purpose flour
- 2 cups granulated sugar
- 1 teaspoon baking powder
- 1 teaspoon baking soda
- 1 teaspoon ground cinnamon
- 1/2 teaspoon ground nutmeg
- 1/2 teaspoon salt
- 1 cup vegetable oil
- 4 large eggs
- 3 cups grated carrots
- 1 cup chopped walnuts (optional)
- 1 teaspoon vanilla extract
- 8 oz cream cheese, softened
- 1/2 cup unsalted butter, softened
- 4 cups powdered sugar
- 1 teaspoon vanilla extract (for frosting)
Instructions
- Preheat the oven to 350°F (175°C). Grease and flour two 9-inch round cake pans.
- In a large bowl, whisk together flour, sugar, baking powder, baking soda, cinnamon, nutmeg, and salt.
- In another bowl, mix the oil, eggs, grated carrots, and vanilla extract until well combined.
- Gradually add the wet ingredients to the dry ingredients, stirring until just combined. Fold in the walnuts if using.
- Divide the batter evenly between the prepared pans. Bake for 25-30 minutes or until a toothpick inserted in the center comes out clean.
- Let the cakes cool in the pans for 10 minutes, then transfer to wire racks to cool completely.
- For the frosting, beat together the cream cheese and butter until smooth. Gradually add powdered sugar and vanilla extract, mixing until creamy.
- Once the cakes are completely cool, spread frosting between the layers and over the top and sides of the cake.
- Decorate with additional walnuts or mini carrot decorations if desired. Slice and enjoy!
Relish The Creamy Goodness Of Rice Pudding: A Cozy Dessert
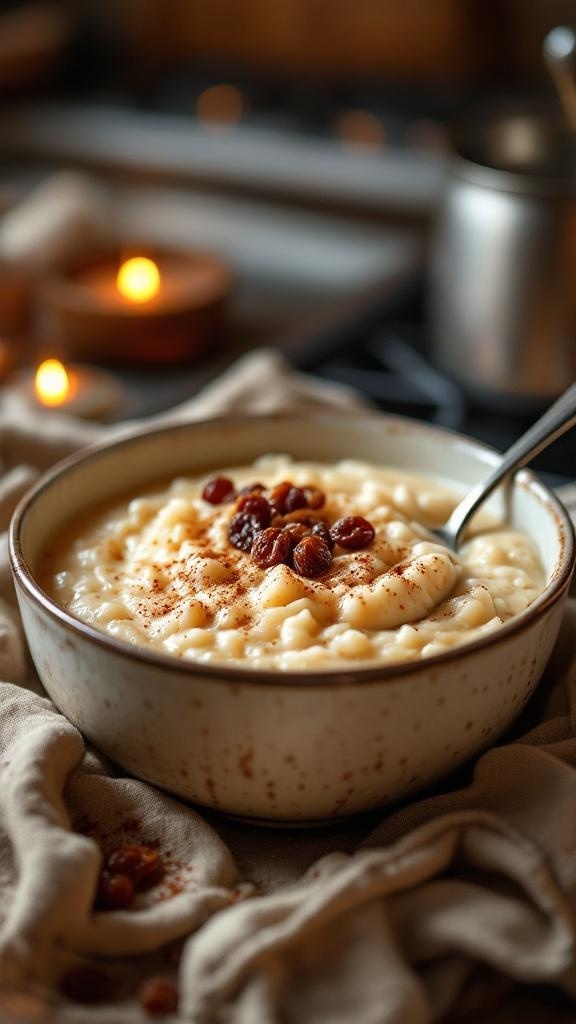
Rice pudding is a classic dessert that brings warmth and comfort to any gathering. The image showcases a bowl of creamy rice pudding, topped with a sprinkle of cinnamon and a few raisins. This cozy dish is perfect for Thanksgiving, offering a delightful alternative to more traditional desserts.
Making rice pudding is simple and requires just a few ingredients. The creamy texture and sweet flavor make it a favorite among both kids and adults. Plus, it’s an easy recipe that even beginners can master!
To prepare this delicious dessert, you’ll need rice, milk, sugar, and a few spices. The combination of these ingredients creates a rich and satisfying treat that pairs well with the festive atmosphere of Thanksgiving.
Ingredients
- 1 cup Arborio rice
- 4 cups whole milk
- 1/2 cup granulated sugar
- 1 teaspoon vanilla extract
- 1/2 teaspoon ground cinnamon
- 1/4 teaspoon salt
- 1/2 cup raisins (optional)
Instructions
- Cook the Rice: In a medium saucepan, combine the rice and 1 cup of water. Bring to a boil, then reduce to a simmer. Cover and cook for about 15 minutes until the water is absorbed.
- Add Milk and Sugar: Stir in the milk, sugar, vanilla, cinnamon, and salt. Cook over medium heat, stirring frequently, until the mixture thickens, about 20-25 minutes.
- Incorporate Raisins: If using, add the raisins during the last 5 minutes of cooking. Stir well.
- Serve: Once thickened, remove from heat and let it cool slightly. Serve warm or chilled, garnished with a sprinkle of cinnamon.
Satisfy Your Sweet Tooth With Chocolate Chip Cookie Cake: A Fun Twist

Chocolate chip cookie cake is a delightful treat that combines the classic flavors of cookies with the fun of a cake. This dessert is perfect for Thanksgiving, bringing a cozy, comforting vibe to your holiday table. The image showcases a beautifully baked cookie cake, topped with colorful sprinkles, making it a festive addition to any celebration.
The cake is thick and chewy, filled with gooey chocolate chips that melt in your mouth. It's a great option for those who want something a bit different from traditional pies. Plus, it’s easy to make, making it perfect for beginners.
To make this cookie cake, you’ll need simple ingredients that you probably already have in your pantry. Gather your flour, sugar, butter, eggs, and of course, chocolate chips. The steps are straightforward, ensuring that even novice bakers can whip this up without a hitch.
Once baked, you can serve it warm or at room temperature. It pairs wonderfully with a scoop of vanilla ice cream or a drizzle of chocolate sauce. This cookie cake is sure to impress your family and friends, making it a must-try for your Thanksgiving dessert lineup!
Treat Yourself To Butterscotch Pudding: A Creamy Delight
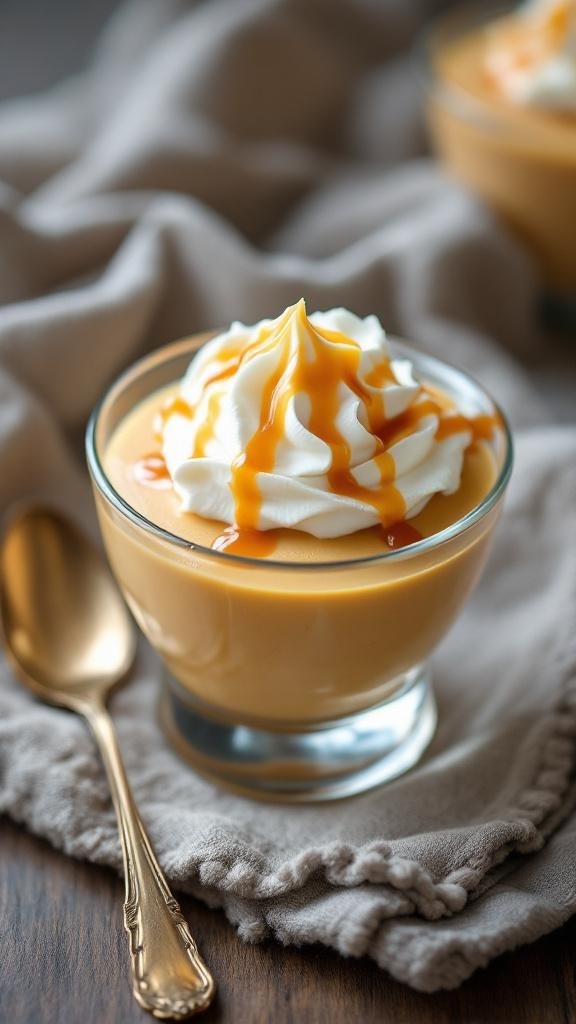
Butterscotch pudding is a classic dessert that brings comfort and joy to any Thanksgiving table. This creamy delight is rich, smooth, and has a sweet, buttery flavor that everyone loves. The image shows a beautifully presented serving of butterscotch pudding topped with a generous swirl of whipped cream and a drizzle of caramel sauce. It’s simple yet elegant, making it perfect for both casual gatherings and festive occasions.
Making butterscotch pudding is straightforward, even for beginners. You don’t need fancy equipment or hard-to-find ingredients. Just a few pantry staples and some patience will get you a delicious dessert that will impress your family and friends.
Let’s get into the ingredients and steps to create this delightful pudding. It’s a great way to treat yourself and your loved ones this Thanksgiving!
Ingredients
- 1 cup brown sugar
- 1/4 cup cornstarch
- 1/4 teaspoon salt
- 2 3/4 cups milk
- 4 tablespoons unsalted butter
- 1 teaspoon vanilla extract
- Whipped cream for topping
- Caramel sauce for drizzling
Instructions
- In a medium saucepan, whisk together brown sugar, cornstarch, and salt.
- Gradually add milk while whisking to combine. Cook over medium heat, stirring constantly until the mixture thickens and begins to bubble.
- Remove from heat and stir in butter and vanilla extract until smooth.
- Pour the pudding into serving dishes and let it cool to room temperature. Then refrigerate for at least 2 hours.
- Before serving, top with whipped cream and drizzle with caramel sauce.
Savor The Exquisite Taste Of Tiramisu: An Italian Classic
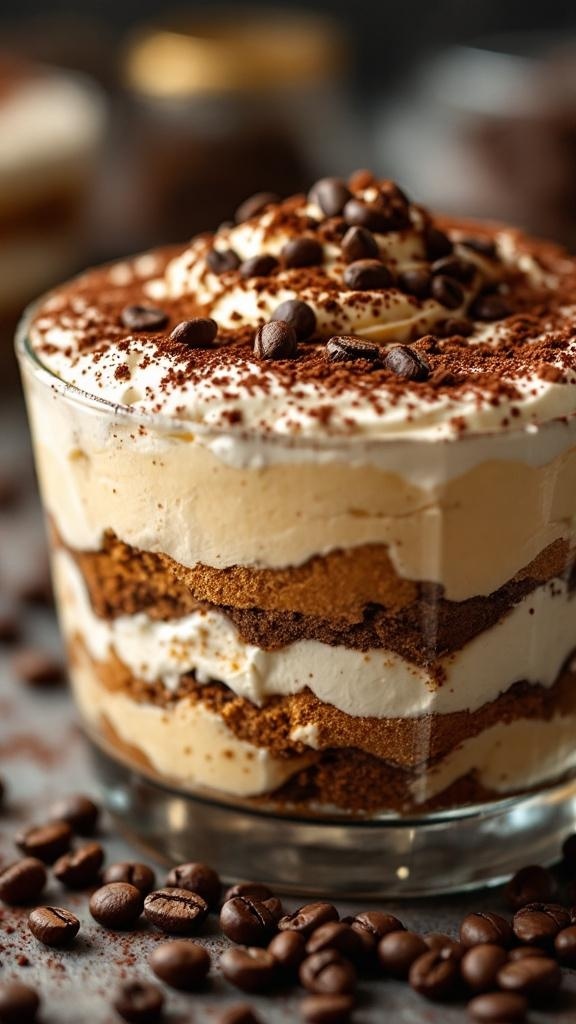
Tiramisu is a delightful Italian dessert that combines layers of coffee-soaked ladyfingers with a rich mascarpone cream. The image captures this classic treat beautifully, showcasing its creamy layers topped with cocoa powder and coffee beans. It’s a dessert that not only looks stunning but also tastes incredible.
This recipe is perfect for beginners. You don’t need to be a pro in the kitchen to whip up this crowd-pleaser. With just a few simple ingredients, you can create a dessert that will impress your family and friends.
Let’s get started on making this delicious tiramisu!
Ingredients
- 1 cup strong brewed coffee, cooled
- 3 large eggs
- 1/2 cup granulated sugar
- 1 cup mascarpone cheese
- 1 cup heavy cream
- 1 teaspoon vanilla extract
- 24 ladyfingers
- Cocoa powder for dusting
- Chocolate shavings or coffee beans for garnish (optional)
Instructions
- Prepare the Coffee: Brew a strong cup of coffee and let it cool completely.
- Whip the Eggs: In a mixing bowl, whisk the eggs and sugar together until pale and fluffy.
- Add Mascarpone: Gently fold in the mascarpone cheese until smooth.
- Whip the Cream: In another bowl, whip the heavy cream and vanilla extract until soft peaks form. Carefully fold this into the mascarpone mixture.
- Layer the Dessert: Quickly dip each ladyfinger into the cooled coffee and layer them in a dish. Spread half of the mascarpone mixture over the ladyfingers. Repeat with another layer of dipped ladyfingers and the remaining mascarpone mixture.
- Chill: Cover and refrigerate for at least 4 hours, or overnight for best results.
- Serve: Before serving, dust the top with cocoa powder and garnish with chocolate shavings or coffee beans if desired.
Indulge In The Flavors Of Berry Crisp: A Colorful And Fruity Dessert
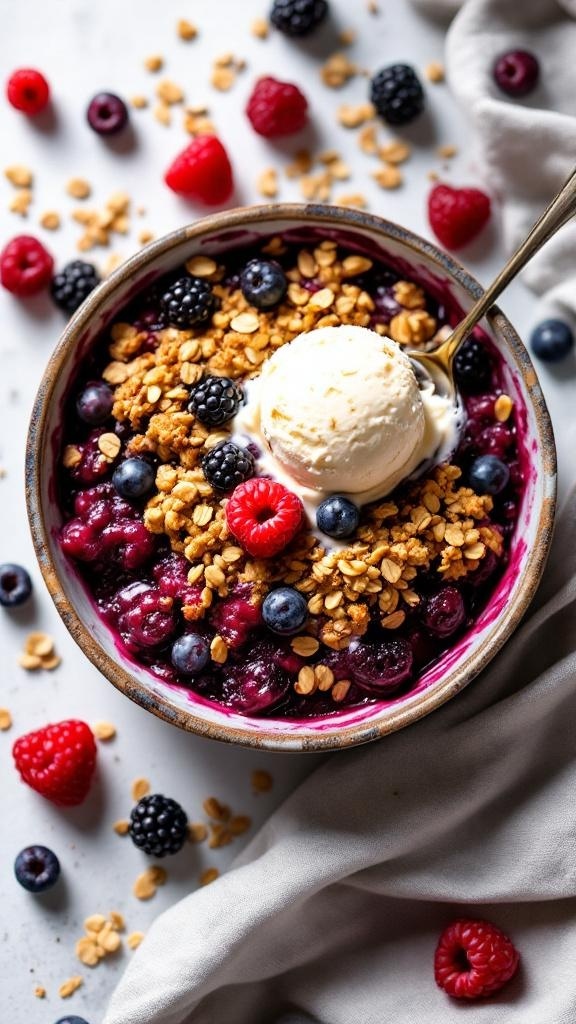
Berry crisp is a delightful dessert that brings together the sweetness of berries and the crunch of a golden topping. This dish is not only visually appealing with its vibrant colors but also incredibly simple to make. Imagine a warm bowl filled with juicy blueberries, raspberries, and blackberries, all topped with a crispy oat mixture. It’s a treat that everyone will love!
The combination of fresh berries creates a burst of flavor in every bite. When baked, the berries become soft and syrupy, while the topping adds a satisfying crunch. Serve it warm with a scoop of vanilla ice cream for an extra special touch. This dessert is perfect for Thanksgiving or any gathering where you want to impress your guests without spending hours in the kitchen.
Now, let’s get to the recipe so you can whip up this berry crisp and enjoy the deliciousness!
Ingredients
- 2 cups mixed berries (blueberries, raspberries, blackberries)
- 1/2 cup granulated sugar
- 1 tablespoon cornstarch
- 1 teaspoon vanilla extract
- 1 cup rolled oats
- 1/2 cup all-purpose flour
- 1/3 cup brown sugar, packed
- 1/2 teaspoon ground cinnamon
- 1/4 cup unsalted butter, melted
Instructions
- Preheat the oven to 350°F (175°C).
- In a mixing bowl, combine the mixed berries, granulated sugar, cornstarch, and vanilla extract. Toss gently to coat the berries.
- Transfer the berry mixture to a greased baking dish.
- In another bowl, mix the rolled oats, flour, brown sugar, and cinnamon. Pour in the melted butter and stir until crumbly.
- Sprinkle the oat mixture evenly over the berries.
- Bake for 30-35 minutes, or until the topping is golden brown and the berries are bubbling.
- Let it cool slightly before serving. Enjoy warm with a scoop of ice cream!
Create A Cozy Atmosphere With Gingerbread Cookies: A Holiday Favorite

Gingerbread cookies are a classic treat that brings warmth and joy to any holiday gathering. The image captures a cheerful gingerbread man hanging amidst a backdrop of twinkling lights and festive decorations. This cozy scene invites you to dive into the spirit of the season, making it perfect for your Thanksgiving dessert table.
The aroma of ginger, cinnamon, and molasses fills the air as you bake these delightful cookies. They are not just tasty; they also add a charming touch to your holiday decor. You can hang them on your tree, use them as table decorations, or simply enjoy them with a warm cup of cocoa.
Making gingerbread cookies is a fun activity for the whole family. Kids love to help with decorating, and it’s a great way to create lasting memories. Plus, the process is simple enough for beginners, making it a perfect choice for your Thanksgiving festivities.
Ingredients
- 3 cups all-purpose flour
- 1 tablespoon ground ginger
- 1 tablespoon ground cinnamon
- 1/2 teaspoon ground cloves
- 1 teaspoon baking soda
- 1/2 teaspoon salt
- 1 cup unsalted butter, softened
- 1 cup brown sugar, packed
- 1/2 cup molasses
- 1 large egg
- 1 teaspoon vanilla extract
- Royal icing for decoration (optional)
Instructions
- Mix Dry Ingredients: In a bowl, whisk together flour, ginger, cinnamon, cloves, baking soda, and salt. Set aside.
- Combine Wet Ingredients: In a large bowl, beat the softened butter and brown sugar until creamy. Add molasses, egg, and vanilla, mixing until well combined.
- Combine Mixtures: Gradually add the dry ingredients to the wet mixture, stirring until a dough forms. Wrap the dough in plastic wrap and chill for at least 1 hour.
- Preheat Oven: Preheat your oven to 350°F (175°C). Line baking sheets with parchment paper.
- Roll and Cut: Roll out the chilled dough on a floured surface to about 1/4 inch thick. Use cookie cutters to cut out shapes and place them on the prepared baking sheets.
- Bake: Bake for 8-10 minutes, or until the edges are firm. Let cool on the baking sheets for a few minutes before transferring to wire racks to cool completely.
- Decorate: Once cooled, decorate with royal icing if desired. Let the icing set before serving.
Struggling to Stay on Track with Your Eating?
You’re not alone. One of the biggest obstacles I see people
face is not knowing what to eat. Between busy schedules, endless diet
advice online, and trying to cook healthy meals that actually taste good—it’s
easy to feel stuck or overwhelmed.
That’s why I created my 21 Quick & Easy Custom
Low-Calorie Meal Plans Program. These plans are built specifically for
you—your goals, your lifestyle, and your food preferences. You won’t find
any cookie-cutter diets here. Just real, satisfying meals that help you stay
full, energized, and on track without the stress.
✅ No more guessing.
✅
No more skipping meals or eating “diet food” you hate.
✅
Just a clear, doable plan that fits your life.
👉 Ready to eat better,
feel better, and finally make progress? [Click here to get your custom meal plans today.]
Not Seeing the Inches Drop No Matter What You Do?
If you’re working out but still not seeing the results in
the mirror, I hear you. So many people come to me after months of doing cardio
or random workouts—and still struggling to lose inches or tone up. The truth
is, your body needs more than just movement. It needs a proven strategy.
My 8-Week Workout Program to Lose Inches is designed
to do just that—burn fat, tighten up, and give you visible results.
These workouts are fun, effective, and designed for real people with real
lives. Whether you’re getting back into fitness or ready to take it to the next
level, this program gives you a clear path to success.
✅ Just 8 weeks to build strength,
confidence, and a fitter shape.
✅
No endless cardio.
✅
No gym required (unless you want it).
👉 If you're ready to
drop inches and feel amazing in your own skin, [click here to start the 8-Week Workout Program].


Comments
Post a Comment