12 Delicious Holiday Weight Watchers Recipes to Keep You on Track
12 Delicious Holiday Weight Watchers Recipes to Keep You on Track
Holidays are a time for celebration, but staying on track with your health goals can be a challenge. This collection of Weight Watchers recipes is crafted to help you enjoy festive meals without guilt. With a variety of delicious options that fit within your plan, you can savor the season while keeping your wellness in check.
Deliciously Lightened Classic Peach Cobbler For The Holidays

Peach cobbler is a beloved dessert, especially during the holidays. This lightened version keeps all the classic flavors while being mindful of your health goals. Imagine a warm, comforting dish filled with juicy peaches and a fluffy topping that’s not too heavy. It’s perfect for gatherings or a cozy night in.
The image showcases a beautifully baked peach cobbler, with golden-brown crust and fresh peach slices peeking through. A scoop of vanilla ice cream melts on top, adding a creamy touch. The vibrant colors of the peaches and the inviting presentation make it hard to resist!
Using fresh peaches, this recipe captures the essence of summer, even in winter. The lightened ingredients help keep the dish lower in calories, making it a guilt-free treat. Serve it warm, and watch everyone come back for seconds!
Ingredients
- 4 cups fresh peaches, sliced
- 1/2 cup granulated sugar
- 1 tablespoon lemon juice
- 1 teaspoon vanilla extract
- 1 cup all-purpose flour
- 1 tablespoon baking powder
- 1/2 teaspoon salt
- 1/2 cup almond milk (or any milk of choice)
- 1/4 cup unsalted butter, melted
- 1 teaspoon cinnamon
Instructions
- Preheat your oven to 350°F (175°C).
- In a large bowl, combine sliced peaches, sugar, lemon juice, and vanilla extract. Toss to coat and set aside.
- In another bowl, mix flour, baking powder, salt, and cinnamon. Stir in almond milk and melted butter until just combined.
- Pour the peach mixture into a greased baking dish. Spoon the batter over the peaches, spreading it gently.
- Bake for 30-35 minutes, or until the top is golden and a toothpick comes out clean.
- Let it cool slightly before serving. Top with a scoop of vanilla ice cream if desired.
Refreshing Watermelon Salad With Feta And Mint
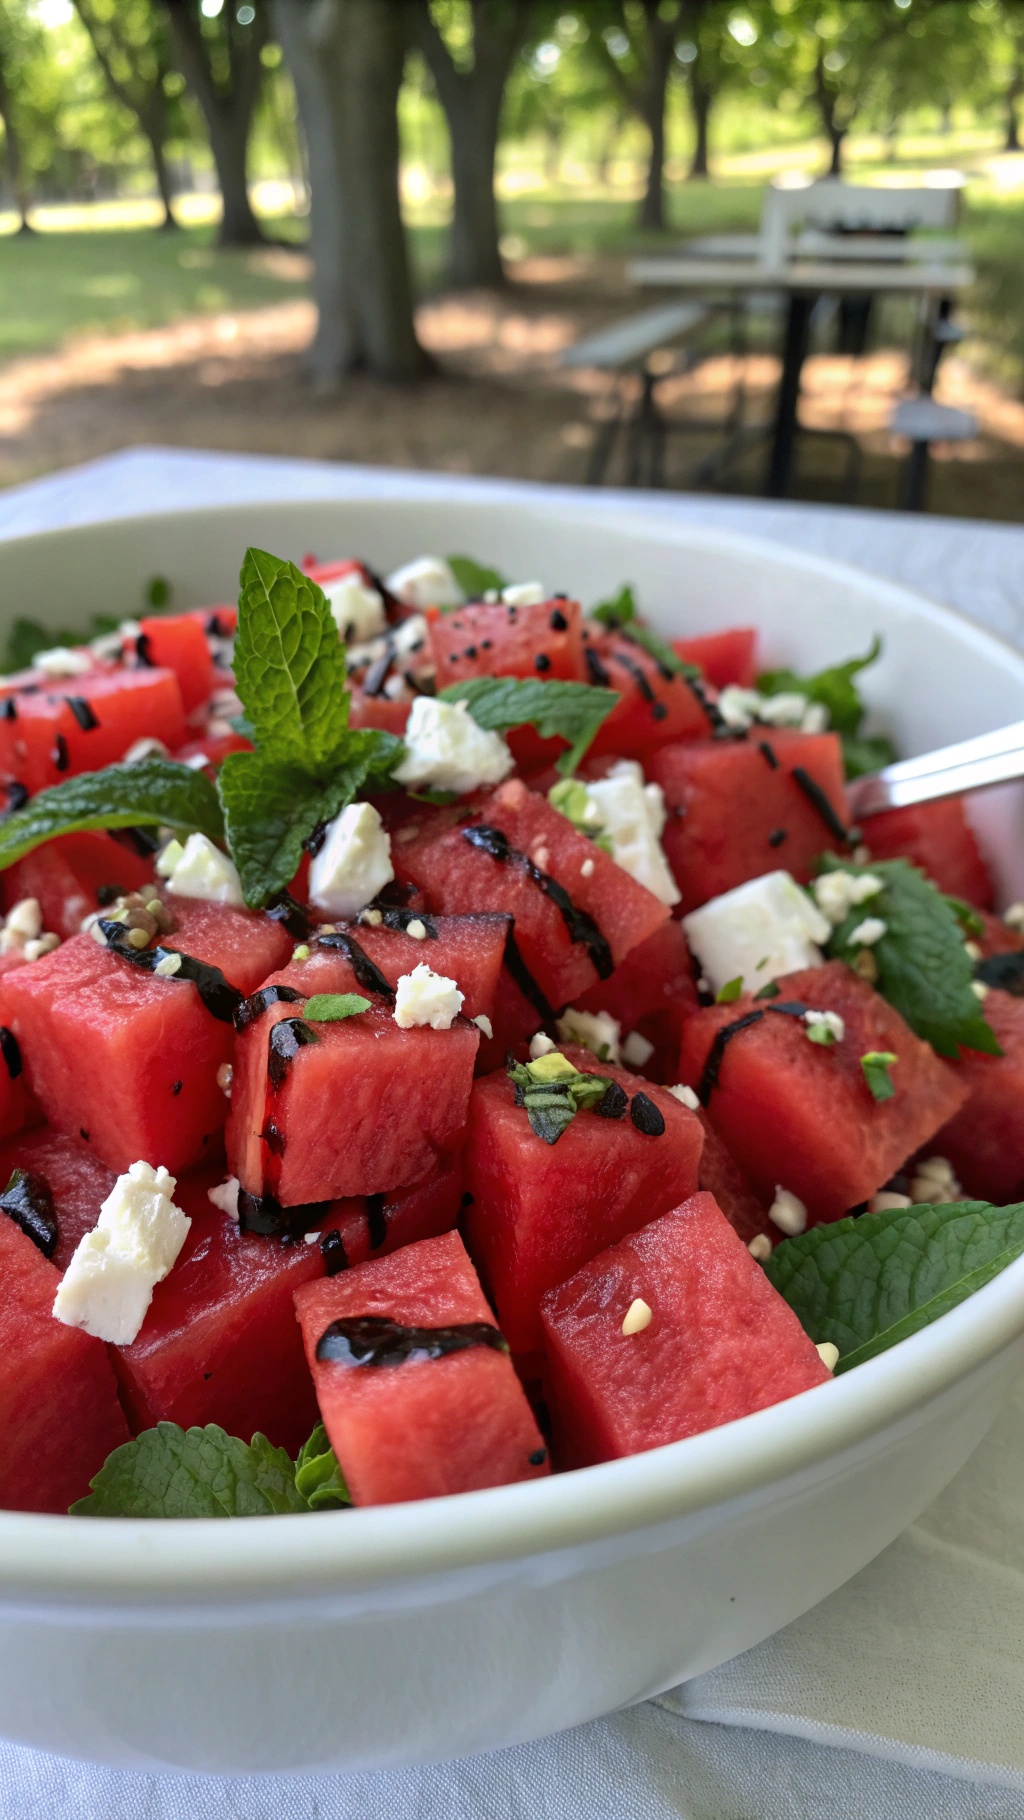
Summer is the perfect time for light and refreshing dishes, and this watermelon salad hits the spot. The bright red watermelon cubes contrast beautifully with the creamy feta cheese and vibrant green mint leaves. Drizzled with a hint of balsamic reduction, this salad is not only visually appealing but also packed with flavor.
Watermelon is hydrating and low in calories, making it a great choice for those keeping an eye on their weight during the holidays. The feta adds a salty kick, while the mint brings a fresh aroma that complements the sweetness of the watermelon. This dish is easy to prepare and perfect for gatherings or a simple family meal.
Ingredients
- 4 cups watermelon, cubed
- 1 cup feta cheese, crumbled
- 1/4 cup fresh mint leaves, chopped
- 2 tablespoons balsamic reduction
- Salt and pepper to taste
Instructions
- In a large bowl, combine the cubed watermelon, crumbled feta, and chopped mint leaves.
- Drizzle the balsamic reduction over the salad and gently toss to combine.
- Season with salt and pepper to taste.
- Serve immediately or chill in the refrigerator for 30 minutes before serving.
Creamy Cauliflower Mash: A Guilt-Free Side
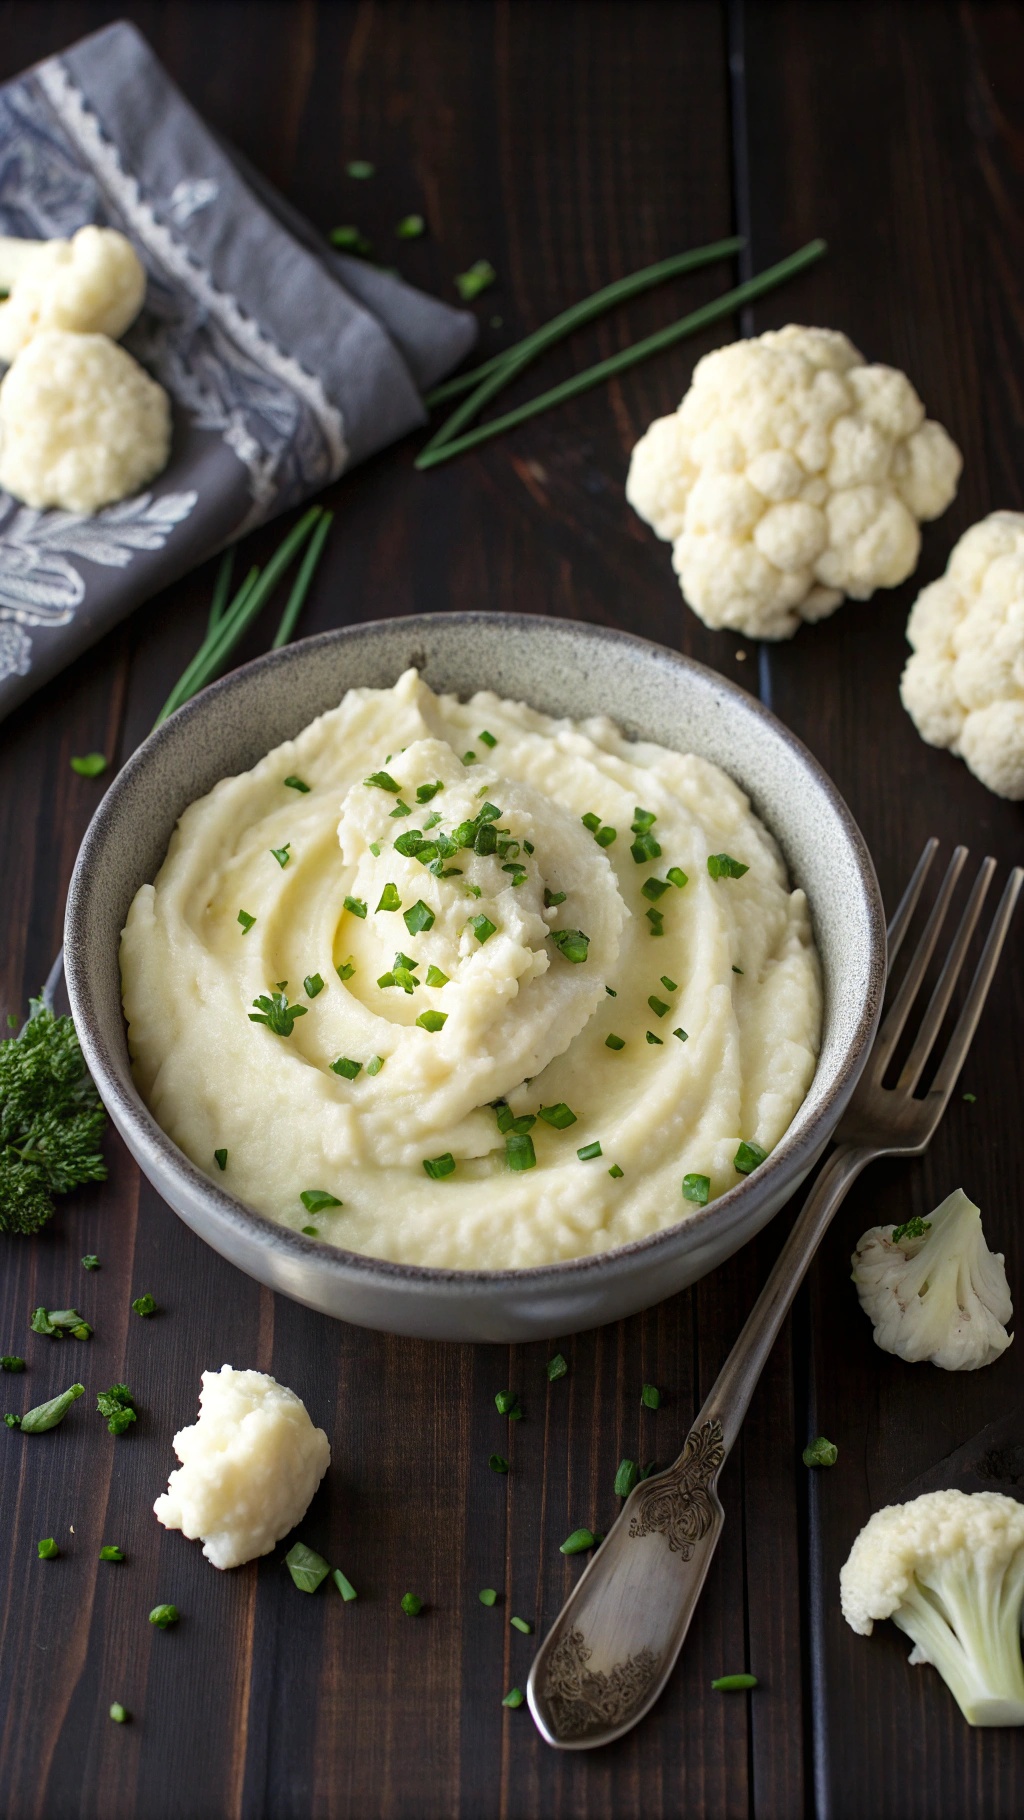
Creamy Cauliflower Mash is a fantastic alternative to traditional mashed potatoes. This dish is perfect for the holidays when you want to enjoy comfort food without the extra calories. The image shows a bowl of smooth, creamy mash topped with fresh chives, surrounded by whole cauliflower florets. It looks inviting and delicious!
This recipe is simple and quick to prepare. You’ll love how the cauliflower takes on a creamy texture, making it a satisfying side dish. Plus, it pairs well with turkey, ham, or any main course you choose for your holiday feast.
Ingredients
- 1 large head of cauliflower, cut into florets
- 2 tablespoons unsalted butter
- 1/4 cup milk (or a dairy-free alternative)
- Salt and pepper to taste
- 2 tablespoons chopped fresh chives (for garnish)
Instructions
- Steam the Cauliflower: In a large pot, steam the cauliflower florets until they are tender, about 10-15 minutes.
- Blend: Transfer the steamed cauliflower to a blender or food processor. Add the butter and milk. Blend until smooth and creamy.
- Season: Taste and season with salt and pepper as needed. Blend again to mix.
- Serve: Spoon the creamy cauliflower mash into a serving bowl. Top with chopped chives for a fresh touch.
GET 21 QUICK & EASY LOW-CALORIE MEAL PLANS
Zesty Lemon Herb Grilled Chicken For A Flavorful Feast

This zesty lemon herb grilled chicken is a perfect dish for your holiday gatherings. The bright flavors of lemon and fresh herbs make it a standout choice that everyone will love. Grilling adds a smoky touch, enhancing the taste while keeping it healthy. Serve it alongside colorful grilled vegetables for a complete meal that looks as good as it tastes.
The chicken is marinated to soak up all those delicious flavors. It’s simple to prepare and can be made ahead of time, making your holiday cooking stress-free. Plus, it’s a great way to stay on track with your healthy eating goals during the festive season.
Here’s how to make this delightful dish:
Ingredients
- 4 boneless, skinless chicken breasts
- 1/4 cup olive oil
- 2 lemons (juiced and zested)
- 3 cloves garlic (minced)
- 1 tablespoon fresh rosemary (chopped)
- 1 tablespoon fresh thyme (chopped)
- Salt and pepper to taste
- Vegetables for grilling (like bell peppers, zucchini, and cherry tomatoes)
Instructions
- Prepare the Marinade: In a bowl, mix olive oil, lemon juice, lemon zest, garlic, rosemary, thyme, salt, and pepper.
- Marinate the Chicken: Place the chicken breasts in a resealable bag or dish. Pour the marinade over the chicken, ensuring it's well coated. Let it marinate in the fridge for at least 30 minutes, or up to 4 hours for more flavor.
- Preheat the Grill: Heat your grill to medium-high. If using a grill pan, heat it on the stove.
- Grill the Chicken: Remove the chicken from the marinade and discard the marinade. Grill the chicken for about 6-7 minutes on each side, or until fully cooked and juices run clear.
- Grill the Vegetables: Toss your choice of vegetables in olive oil, salt, and pepper. Grill them for about 5-7 minutes until tender and slightly charred.
- Serve: Plate the grilled chicken with the vegetables. Garnish with extra lemon slices and herbs if desired.
Sweet And Spicy Baked Salmon With Maple Glaze

This sweet and spicy baked salmon is a fantastic dish that fits perfectly into your holiday meal plan. The salmon is glazed with a delightful mix of maple syrup and spices, giving it a rich flavor that’s hard to resist. The vibrant colors of the dish, with the golden glaze and fresh green onions, make it visually appealing too.
Pairing the salmon with asparagus not only adds a pop of color but also boosts the nutritional value of your meal. The combination of flavors and textures creates a satisfying dish that feels indulgent while still being healthy.
Here’s how to make this delicious recipe:
Ingredients
- 4 salmon fillets
- 1/4 cup maple syrup
- 2 tablespoons soy sauce
- 1 tablespoon Dijon mustard
- 1 teaspoon garlic powder
- 1/2 teaspoon red pepper flakes
- Salt and pepper to taste
- 1 tablespoon sesame seeds
- 2 green onions, sliced
- 1 bunch asparagus
- 1 tablespoon olive oil
Instructions
- Preheat your oven to 400°F (200°C).
- In a bowl, mix maple syrup, soy sauce, Dijon mustard, garlic powder, red pepper flakes, salt, and pepper.
- Place the salmon fillets on a baking sheet lined with parchment paper. Brush the maple glaze generously over the salmon.
- Trim the asparagus and toss it with olive oil, salt, and pepper. Arrange it around the salmon on the baking sheet.
- Bake for 15-20 minutes, or until the salmon flakes easily with a fork and the asparagus is tender.
- Sprinkle sesame seeds and sliced green onions over the salmon before serving.
Classic Green Bean Casserole With A Healthier Twist
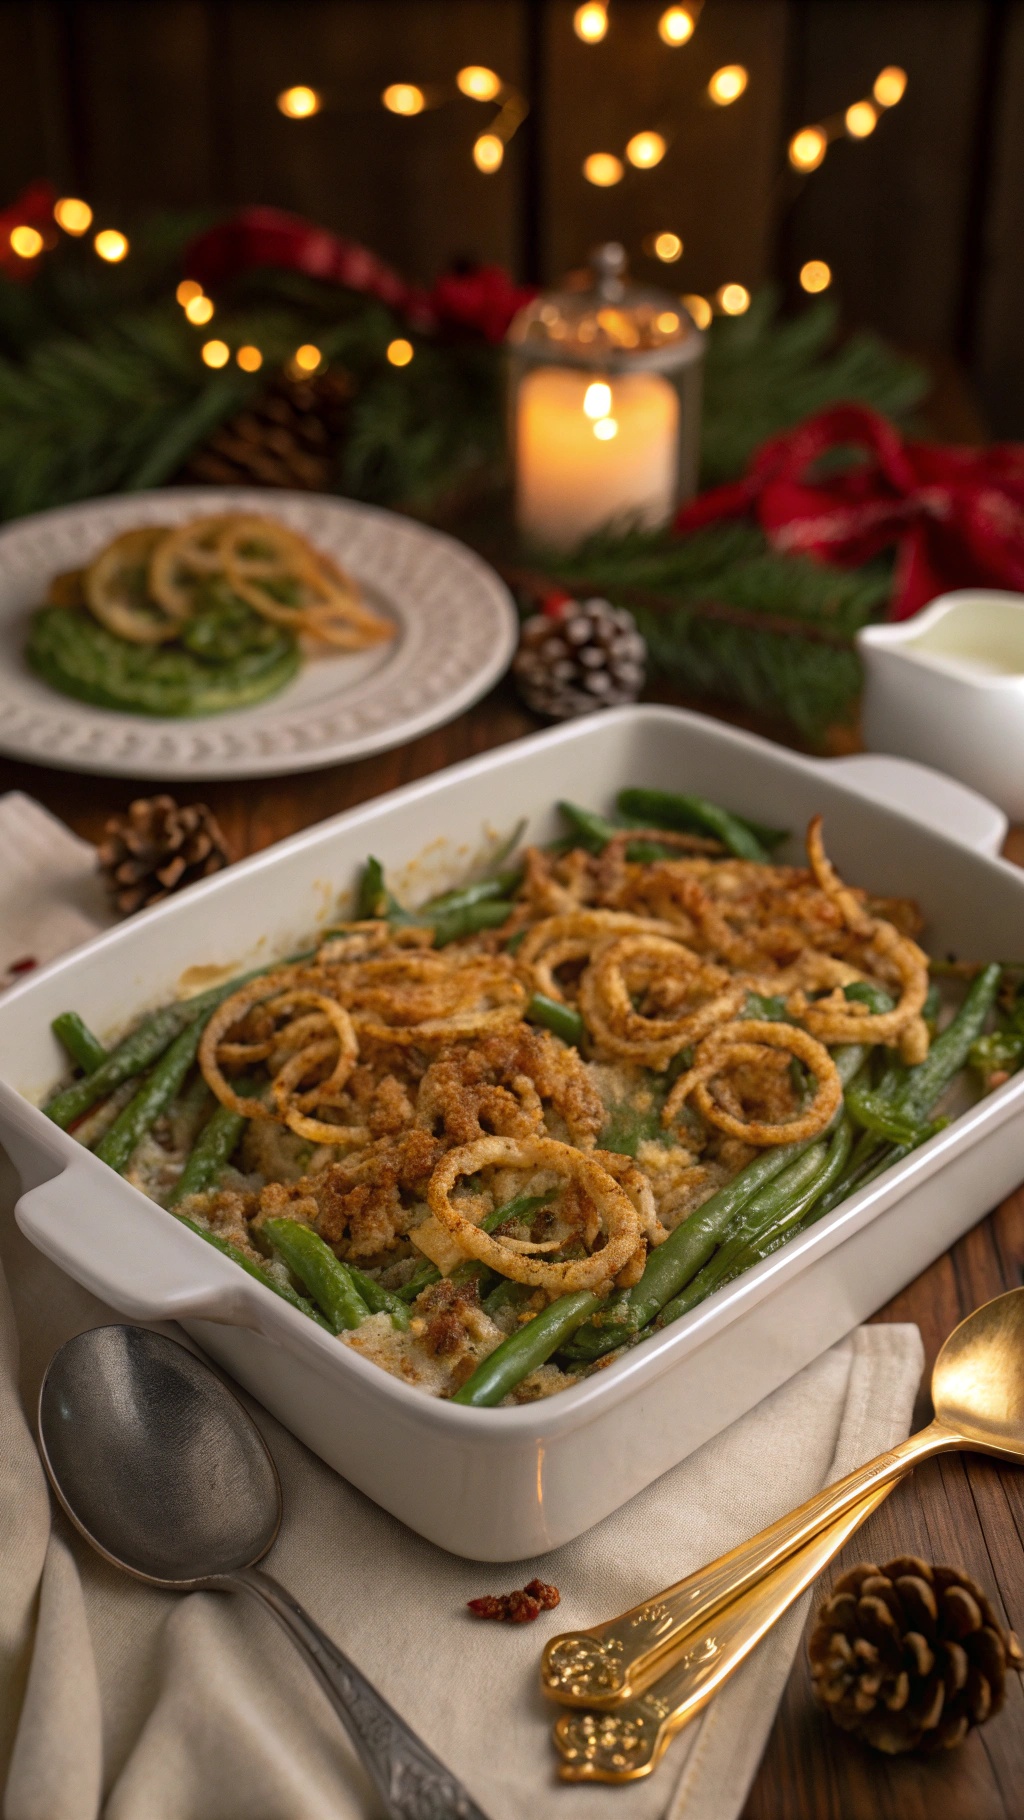
Green bean casserole is a beloved holiday dish, often bringing back warm memories of family gatherings. This version keeps the classic flavors while making it a bit healthier. The creamy sauce is made lighter, and fresh green beans add a crisp texture. Topped with crunchy onions, it’s a dish that everyone will enjoy.
In the image, you can see a beautifully baked green bean casserole, golden and bubbly, with crispy onion rings on top. The warm, inviting glow of the candles and festive decorations in the background create a cozy holiday atmosphere. This dish not only looks great but also fits perfectly into your holiday meal plan without the guilt.
Ingredients
- 1 pound fresh green beans, trimmed
- 1 can (10.5 oz) reduced-fat cream of mushroom soup
- 1/2 cup low-fat milk
- 1 teaspoon soy sauce
- 1/2 teaspoon garlic powder
- 1/4 teaspoon black pepper
- 1 cup French fried onions (divided)
- 1/2 cup shredded reduced-fat cheddar cheese (optional)
Instructions
- Preheat your oven to 350°F (175°C).
- Blanch the green beans in boiling water for about 5 minutes, then drain and set aside.
- In a large bowl, mix the cream of mushroom soup, milk, soy sauce, garlic powder, and black pepper until smooth.
- Add the blanched green beans and half of the French fried onions to the mixture. Stir until well combined.
- Transfer the mixture to a greased baking dish. If using, sprinkle the cheddar cheese on top.
- Bake for 25 minutes, then remove from the oven and sprinkle the remaining French fried onions on top. Return to the oven and bake for an additional 10 minutes, or until the onions are golden brown.
- Let it cool slightly before serving. Enjoy your healthier twist on a classic!
Wholesome Spinach And Feta Stuffed Chicken Breasts
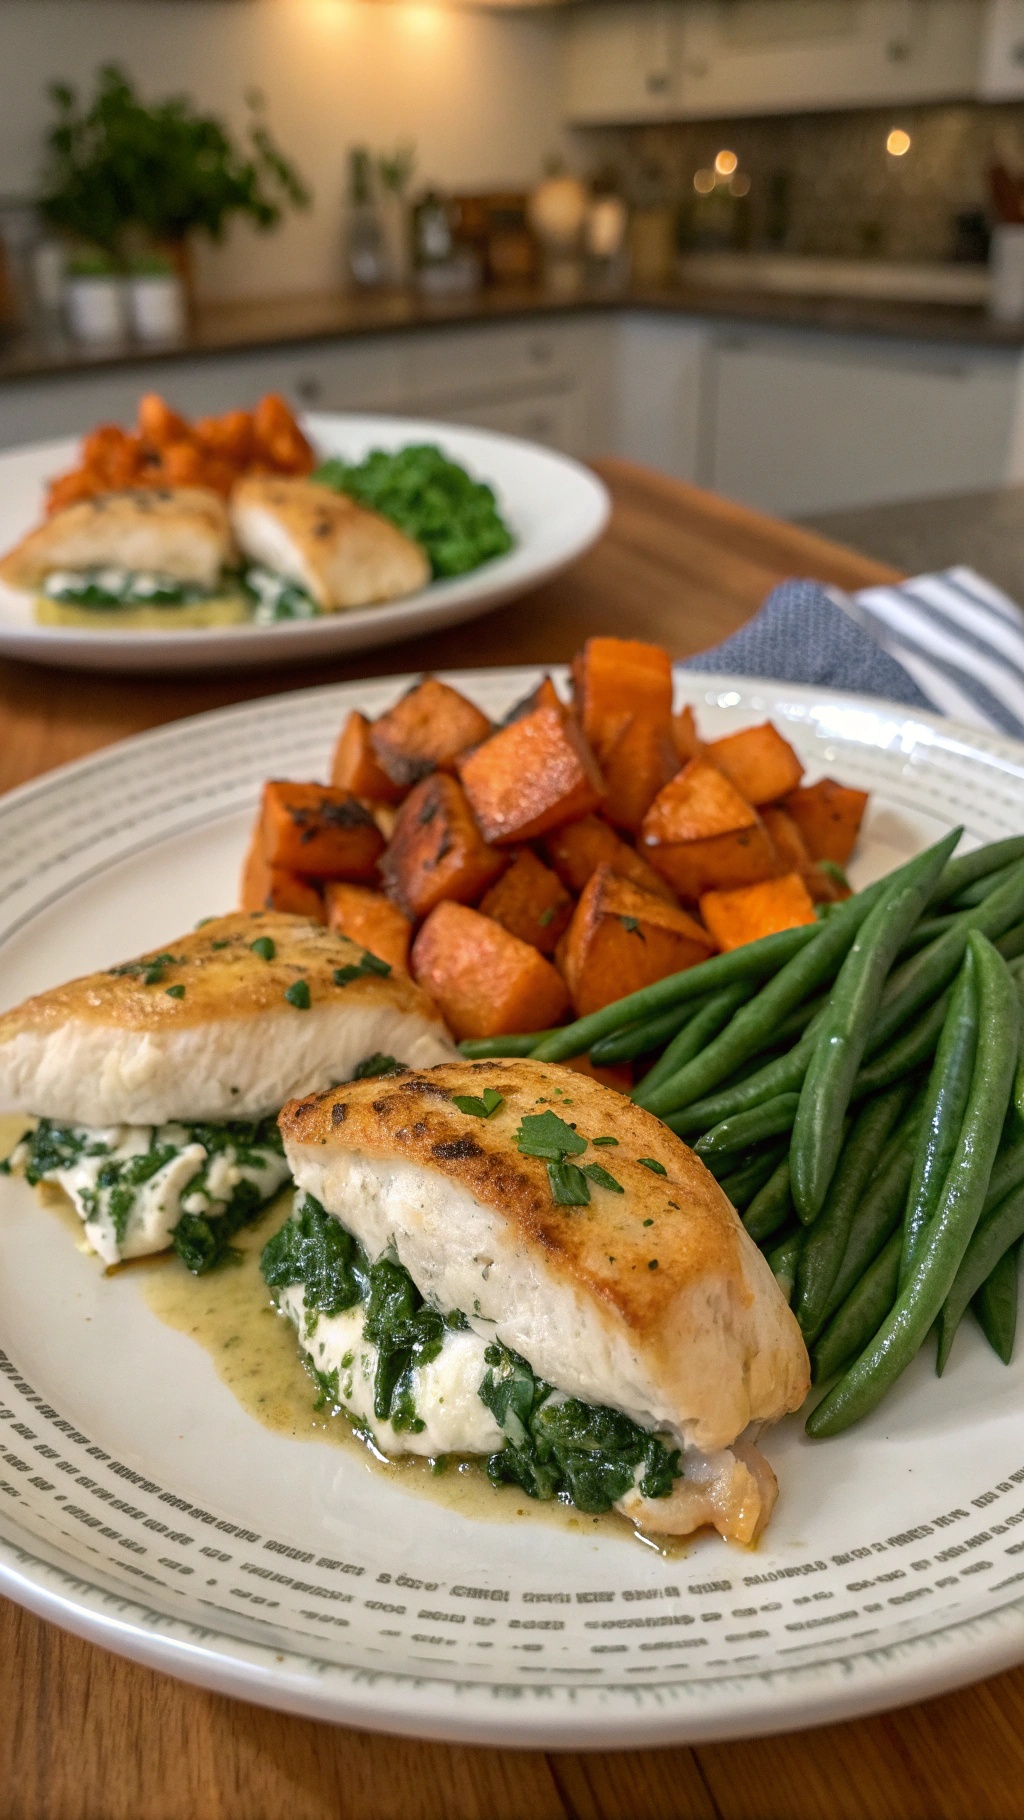
This dish is a delightful way to enjoy a healthy meal without sacrificing flavor. The spinach and feta stuffed chicken breasts are not only visually appealing but also packed with nutrients. The bright green spinach peeking out from the tender chicken adds a pop of color to your plate, making it a feast for the eyes as well as the palate.
Pair this dish with roasted sweet potatoes and green beans for a complete meal. The sweetness of the potatoes complements the savory chicken, while the green beans add a nice crunch. This combination is perfect for keeping your holiday meals on track while still enjoying delicious flavors.
Making this dish is straightforward. Start by preparing the filling with fresh spinach, creamy feta, and herbs. The chicken breasts are then stuffed and seared to golden perfection. This method locks in the juices, ensuring each bite is tender and flavorful.
Ingredients
- 4 boneless, skinless chicken breasts
- 2 cups fresh spinach, chopped
- 1 cup feta cheese, crumbled
- 2 cloves garlic, minced
- 1 tablespoon olive oil
- Salt and pepper to taste
- 1 teaspoon dried oregano
- 1 teaspoon lemon juice
Instructions
- Preheat your oven to 375°F (190°C).
- In a skillet, heat olive oil over medium heat. Add garlic and spinach, cooking until the spinach wilts. Remove from heat and mix in feta, oregano, lemon juice, salt, and pepper.
- Cut a pocket in each chicken breast and stuff with the spinach and feta mixture.
- Season the outside of the chicken with salt and pepper. Sear the stuffed chicken in the skillet for about 3-4 minutes on each side until golden brown.
- Transfer the chicken to a baking dish and bake for 20-25 minutes until cooked through.
- Let it rest for a few minutes before serving. Enjoy with your favorite sides!
GET 8-WEEKS OF WORKOUTS TO LOSE INCHES
Hearty Vegetable Soup: A Bowl Of Warmth And Comfort
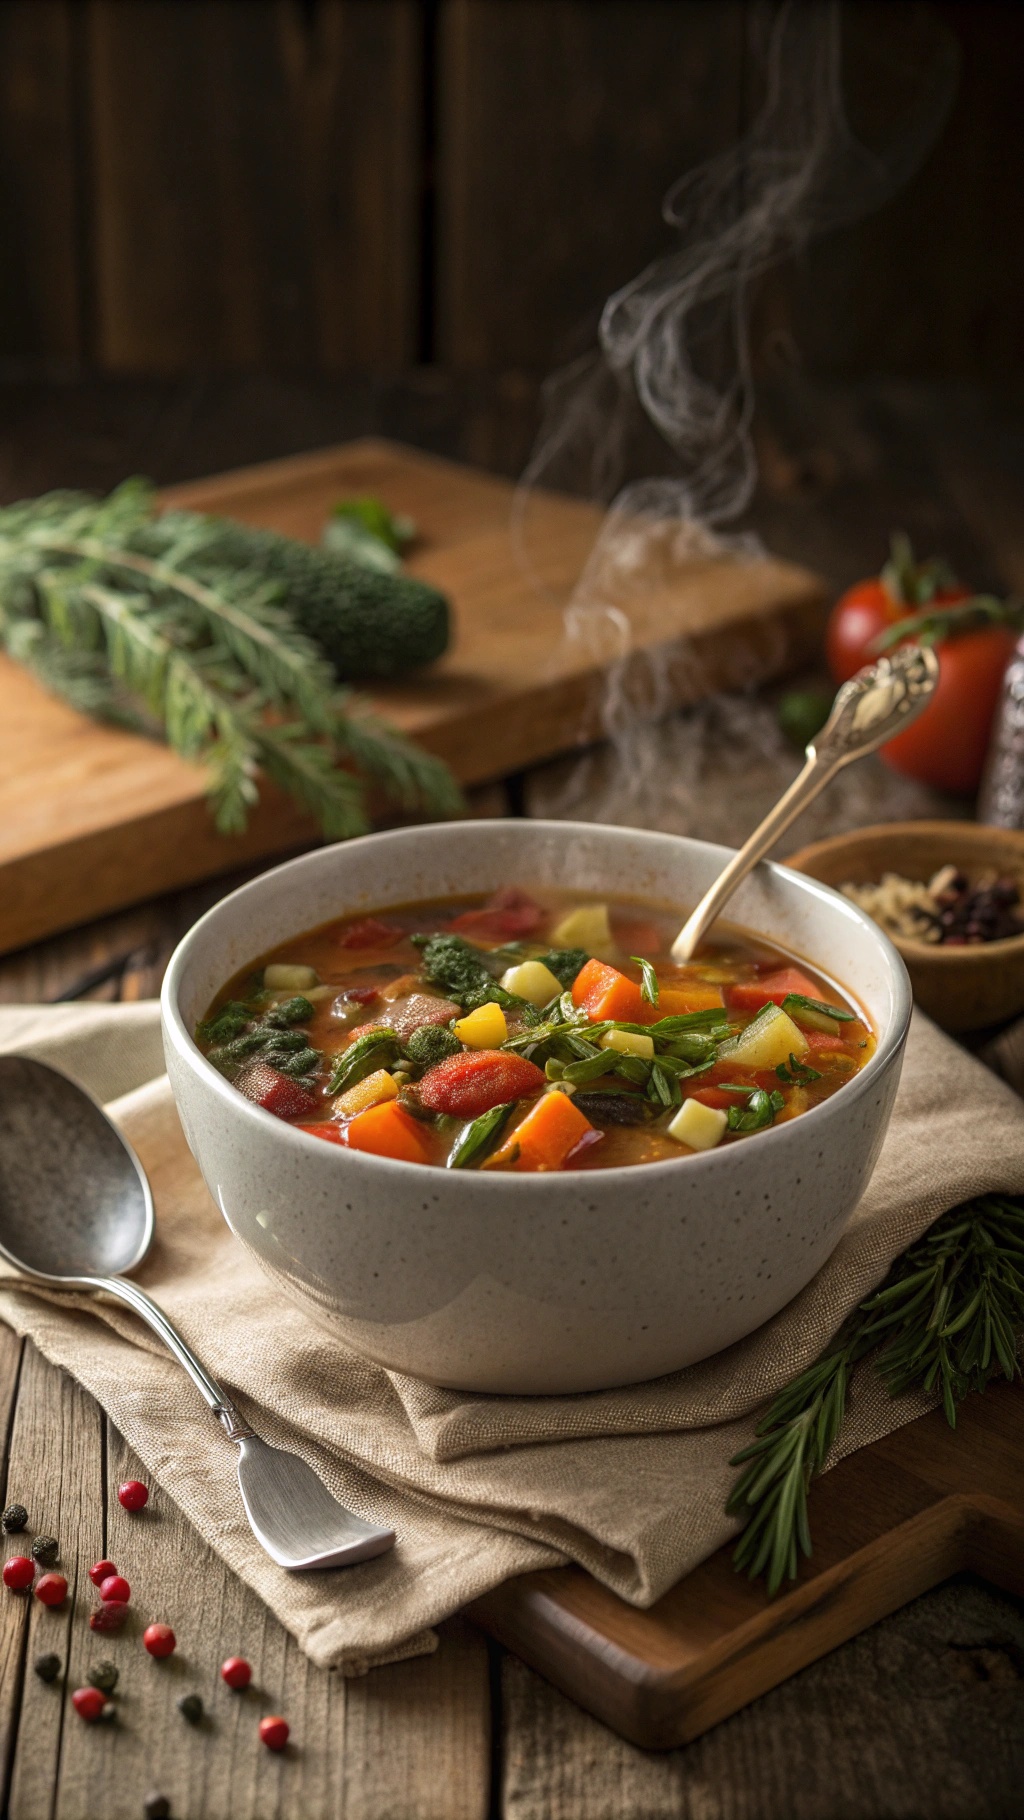
Hearty vegetable soup is the perfect dish for those chilly days when you crave something warm and filling. This soup is packed with colorful vegetables, making it not only nutritious but also visually appealing. The steam rising from the bowl hints at the warmth inside, inviting you to take a spoonful.
Using fresh ingredients like carrots, broccoli, and tomatoes, this soup is a great way to enjoy seasonal produce. The combination of flavors creates a comforting experience that feels like a warm hug. Plus, it’s easy to make and can be customized to include your favorite veggies.
Whether you’re serving it as a starter or a main dish, this hearty vegetable soup will keep you on track during the holiday season. It’s low in calories but high in flavor, making it a great choice for anyone watching their weight.
Ingredients
- 1 tablespoon olive oil
- 1 onion, chopped
- 2 carrots, diced
- 2 celery stalks, diced
- 3 cloves garlic, minced
- 1 zucchini, diced
- 1 bell pepper, chopped
- 1 cup broccoli florets
- 1 can (14.5 oz) diced tomatoes
- 4 cups vegetable broth
- 1 teaspoon dried thyme
- 1 bay leaf
- Salt and pepper to taste
- Fresh parsley for garnish
Instructions
- Heat olive oil in a large pot over medium heat. Add the onion, carrots, and celery. Sauté for about 5 minutes until the vegetables are softened.
- Add the garlic, zucchini, and bell pepper. Cook for another 3-4 minutes until fragrant.
- Stir in the broccoli, diced tomatoes, vegetable broth, thyme, and bay leaf. Bring to a boil.
- Reduce the heat and let it simmer for 20-25 minutes, or until all the vegetables are tender.
- Season with salt and pepper to taste. Remove the bay leaf before serving.
- Garnish with fresh parsley and enjoy your warm bowl of hearty vegetable soup!
Flavor-Packed Turkey Meatballs With A Twist

Turkey meatballs are a fantastic choice for a holiday meal. They are leaner than traditional beef meatballs but still packed with flavor. This recipe gives a fun twist by incorporating fresh herbs and spices that elevate the dish. The image shows a cozy bowl of turkey meatballs served over spaghetti, topped with a sprinkle of cheese and fresh basil. It’s a comforting sight that makes you want to dig in!
These meatballs are not only delicious but also easy to prepare. You can whip them up in no time, making them perfect for holiday gatherings or a cozy family dinner. The rich tomato sauce complements the meatballs beautifully, creating a satisfying meal that everyone will enjoy.
Ingredients
- 1 pound ground turkey
- 1/4 cup breadcrumbs
- 1/4 cup grated Parmesan cheese
- 1/4 cup chopped fresh basil
- 1 clove garlic, minced
- 1 teaspoon onion powder
- 1 teaspoon dried oregano
- 1/2 teaspoon salt
- 1/4 teaspoon black pepper
- 1 egg, beaten
- 2 cups marinara sauce
- Spaghetti, for serving
Instructions
- Preheat your oven to 400°F (200°C).
- In a large bowl, combine ground turkey, breadcrumbs, Parmesan cheese, basil, garlic, onion powder, oregano, salt, pepper, and the beaten egg. Mix until well combined.
- Form the mixture into small meatballs, about 1 inch in diameter, and place them on a baking sheet.
- Bake the meatballs for 20-25 minutes, or until they are cooked through and golden brown.
- While the meatballs are baking, heat the marinara sauce in a saucepan over medium heat.
- Once the meatballs are done, add them to the sauce and let them simmer for a few minutes.
- Serve the meatballs over cooked spaghetti, garnished with extra Parmesan and fresh basil.
Nutty Quinoa Salad With Dried Fruits And Greens

This Nutty Quinoa Salad is a delightful mix of flavors and textures. Imagine a bowl filled with fluffy quinoa, vibrant greens, and a colorful array of dried fruits and nuts. The salad is not just visually appealing; it's also packed with nutrients. The combination of quinoa and greens provides a hearty base, while the dried fruits add a sweet touch that balances the dish perfectly.
In the image, you can see the salad being drizzled with a rich dressing, enhancing its freshness. The background features a serene outdoor setting, making it a perfect dish for gatherings or a cozy meal at home. The wooden table and lush greenery invite you to enjoy this healthy option while soaking in nature.
Ingredients
- 1 cup quinoa
- 2 cups water
- 1/2 cup dried cranberries
- 1/2 cup chopped dried apricots
- 1/2 cup pecans, toasted
- 2 cups mixed greens (spinach, kale, arugula)
- 1/2 cup feta cheese, crumbled
- 1/4 cup olive oil
- 2 tablespoons balsamic vinegar
- Salt and pepper to taste
Instructions
- Rinse the quinoa under cold water. In a medium saucepan, combine quinoa and water. Bring to a boil, then reduce heat to low, cover, and simmer for about 15 minutes or until water is absorbed. Fluff with a fork and let cool.
- In a large bowl, combine the cooled quinoa, dried cranberries, chopped apricots, toasted pecans, and mixed greens.
- In a small bowl, whisk together olive oil, balsamic vinegar, salt, and pepper. Pour the dressing over the salad and toss gently to combine.
- Top with crumbled feta cheese before serving. Enjoy your healthy and delicious Nutty Quinoa Salad!
Spicy Roasted Brussels Sprouts: A Holiday Must-Have

Spicy roasted Brussels sprouts are a delightful addition to any holiday table. These little green gems are not only nutritious but also packed with flavor. Roasting them brings out their natural sweetness while adding a crispy texture that everyone loves. The hint of spice elevates this dish, making it a perfect side for your festive meals.
In the image, you can see beautifully roasted Brussels sprouts, glistening with a touch of oil and sprinkled with red pepper flakes. The vibrant colors make them visually appealing, and they are served in a rustic bowl, adding to the homey feel of the dish. Fresh lemon halves sit nearby, hinting at the zesty flavor that complements the sprouts.
This recipe is simple and quick, making it a must-have for your holiday gatherings. Let’s get started!
Ingredients
- 1 pound Brussels sprouts, trimmed and halved
- 2 tablespoons olive oil
- 1 teaspoon garlic powder
- 1 teaspoon red pepper flakes
- Salt and pepper to taste
- Juice of 1 lemon
Instructions
- Preheat your oven to 400°F (200°C).
- In a large bowl, toss the halved Brussels sprouts with olive oil, garlic powder, red pepper flakes, salt, and pepper until evenly coated.
- Spread the Brussels sprouts in a single layer on a baking sheet.
- Roast in the oven for 20-25 minutes, or until they are golden brown and crispy on the outside.
- Remove from the oven and drizzle with lemon juice before serving.
Classic Baked Apples With A Healthy Crunch
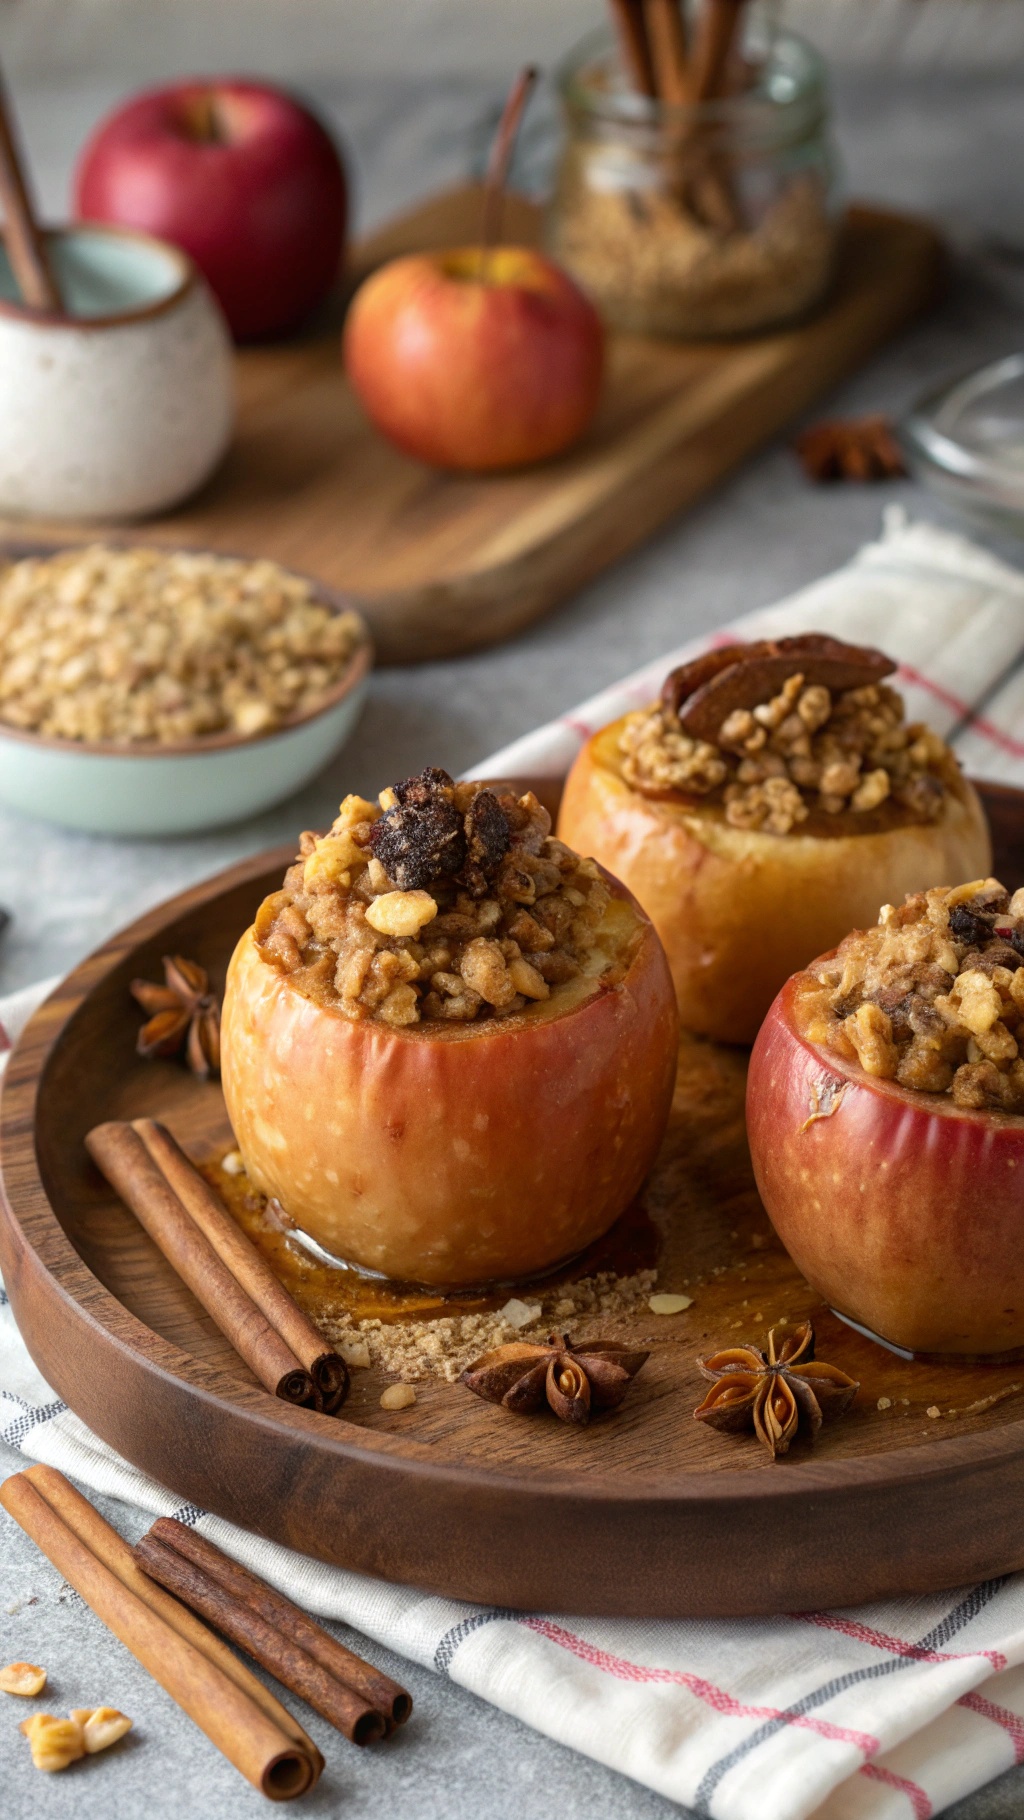
Classic baked apples are a warm and inviting dessert that brings comfort during the holiday season. These apples are not just delicious; they are also a healthier option that fits perfectly into your weight-watching goals. The image showcases beautifully baked apples, each filled to the brim with a crunchy topping that adds texture and flavor.
The vibrant red and golden hues of the apples contrast nicely with the earthy tones of the crunchy topping. You can see hints of cinnamon sticks and star anise, which hint at the warm spices that make this dish so aromatic. The apples are perfectly cored and stuffed, making them look like little edible treasures waiting to be enjoyed.
Making these baked apples is simple and rewarding. They can be served warm, perhaps with a dollop of yogurt or a scoop of low-calorie ice cream for an extra treat. This recipe is a great way to enjoy the sweetness of apples while keeping your health in check.
Ingredients
- 4 medium apples, cored
- 1 cup rolled oats
- 1/2 cup chopped nuts (such as almonds or walnuts)
- 1/4 cup honey or maple syrup
- 1 teaspoon cinnamon
- 1/4 teaspoon nutmeg
- 1/4 cup raisins or dried cranberries (optional)
- 1/2 cup unsweetened applesauce
- 1 tablespoon lemon juice
Instructions
- Prep the Apples: Preheat the oven to 350°F (175°C). Core the apples, leaving the bottom intact to hold the filling.
- Make the Filling: In a bowl, combine the rolled oats, chopped nuts, honey or maple syrup, cinnamon, nutmeg, and optional dried fruit. Mix well until combined.
- Stuff the Apples: Spoon the filling mixture into each cored apple, packing it tightly.
- Prepare for Baking: Place the stuffed apples in a baking dish. Pour the applesauce and lemon juice around the apples in the dish.
- Bake: Cover the dish with foil and bake for 20 minutes. Remove the foil and bake for an additional 10 minutes, or until the apples are tender.
- Serve: Allow to cool slightly before serving. Enjoy warm, optionally topped with yogurt or a scoop of ice cream.
Struggling to Stay on Track with Your Eating?
You’re not alone. One of the biggest obstacles I see people
face is not knowing what to eat. Between busy schedules, endless diet
advice online, and trying to cook healthy meals that actually taste good—it’s
easy to feel stuck or overwhelmed.
That’s why I created my 21 Quick & Easy Custom
Low-Calorie Meal Plans Program. These plans are built specifically for
you—your goals, your lifestyle, and your food preferences. You won’t find
any cookie-cutter diets here. Just real, satisfying meals that help you stay
full, energized, and on track without the stress.
✅ No more guessing.
✅
No more skipping meals or eating “diet food” you hate.
✅
Just a clear, doable plan that fits your life.
👉 Ready to eat better,
feel better, and finally make progress? [Click here to get your custom meal plans today.]
Not Seeing the Inches Drop No Matter What You Do?
If you’re working out but still not seeing the results in
the mirror, I hear you. So many people come to me after months of doing cardio
or random workouts—and still struggling to lose inches or tone up. The truth
is, your body needs more than just movement. It needs a proven strategy.
My 8-Week Workout Program to Lose Inches is designed
to do just that—burn fat, tighten up, and give you visible results.
These workouts are fun, effective, and designed for real people with real
lives. Whether you’re getting back into fitness or ready to take it to the next
level, this program gives you a clear path to success.
✅ Just 8 weeks to build strength,
confidence, and a fitter shape.
✅
No endless cardio.
✅
No gym required (unless you want it).
👉 If you're ready to
drop inches and feel amazing in your own skin, [click here to start the 8-Week Workout Program].


Comments
Post a Comment